Out of Cycle Review
The Review Cycle is a process used to review and approve Response records within the Org. It allows multiple users to collaborate on reviewing and approving a specific record before it gets progress to the next stage. By default, the review process for Response is disabled in the Org. You can perform the Response review process based on the entry criteria set on the Approval Process created for the Response or Response Version object if the two conditions listed below are met:
Enable Out Of Cycle Review is set to true in Custom Metadata Types > Loopio for Salesforce Configuration.
An active Salesforce Approval Process (Review Approval Process) should be available in your org.
Manage Settings:
User can configure the Salesforce Approval Process from Setup > search and select Approval Processes > choose a desired Object from the drop down > select an active Approval Process name and make the required changes as per the business needs.
When a user tries to submit a record for review and there is no applicable approval process in Response Library, then the system will display an error message.
The Implementation team or System Admin must create Flow or Trigger to update Review Status to Review Required. Once the Review Status has been updated to Review Required, the Submit For Review button will be visible.
To submit the Response for review
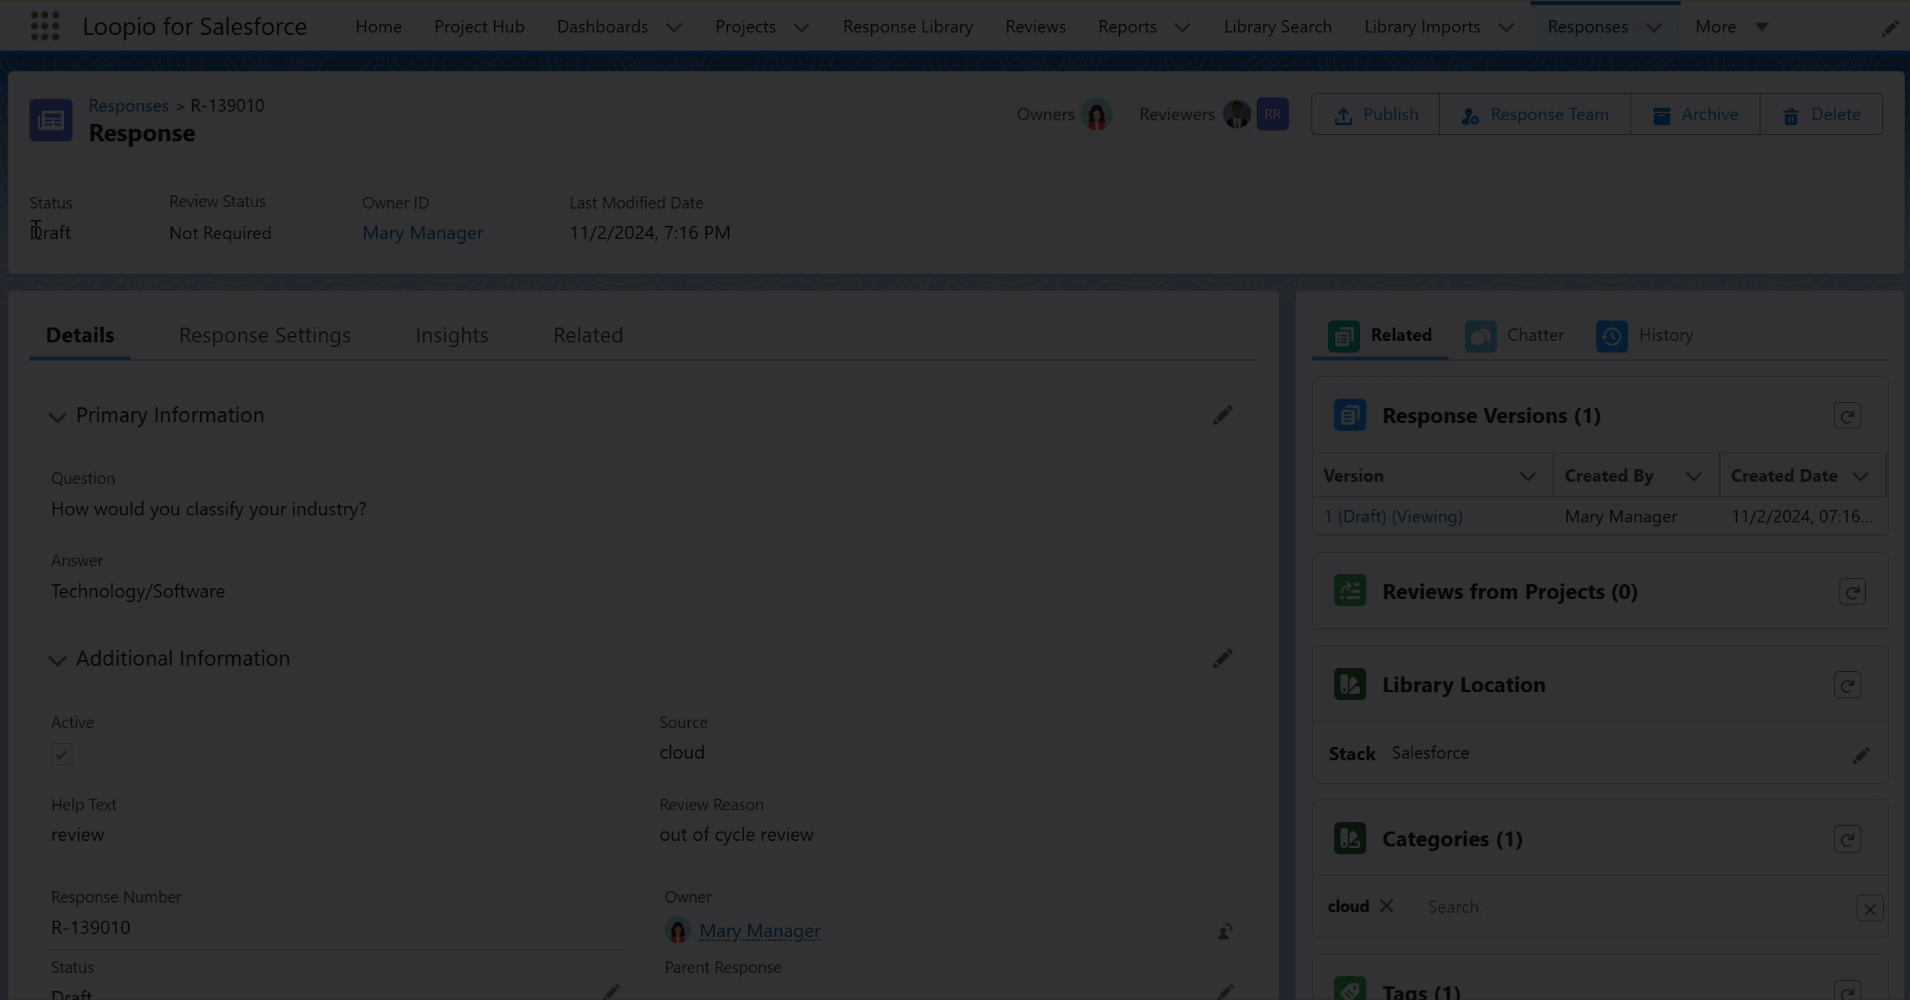
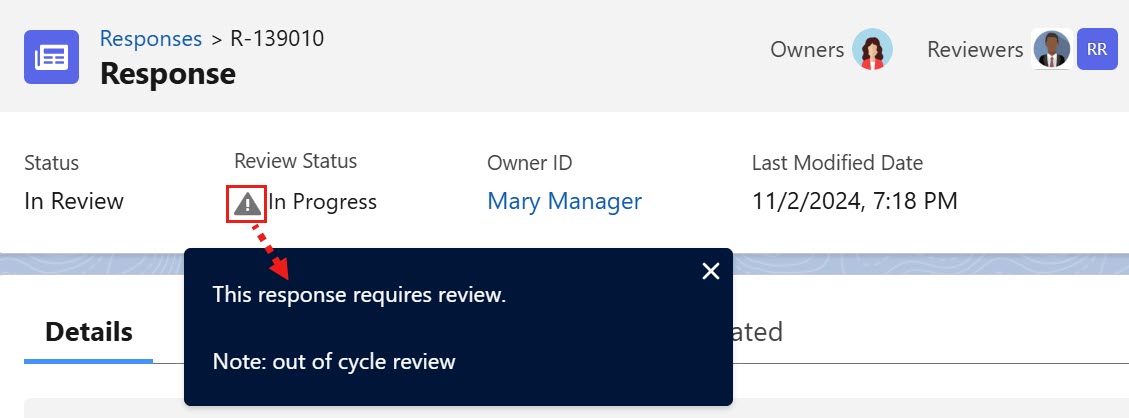
As per user’s workflow configuration, the Review Status will be changed to Review Required in the highlight panel along with the information icon (shows the provided Review Reason values). The Submit For Review button will appear on the right side header. Click the Submit For Review button to initiate the review process.
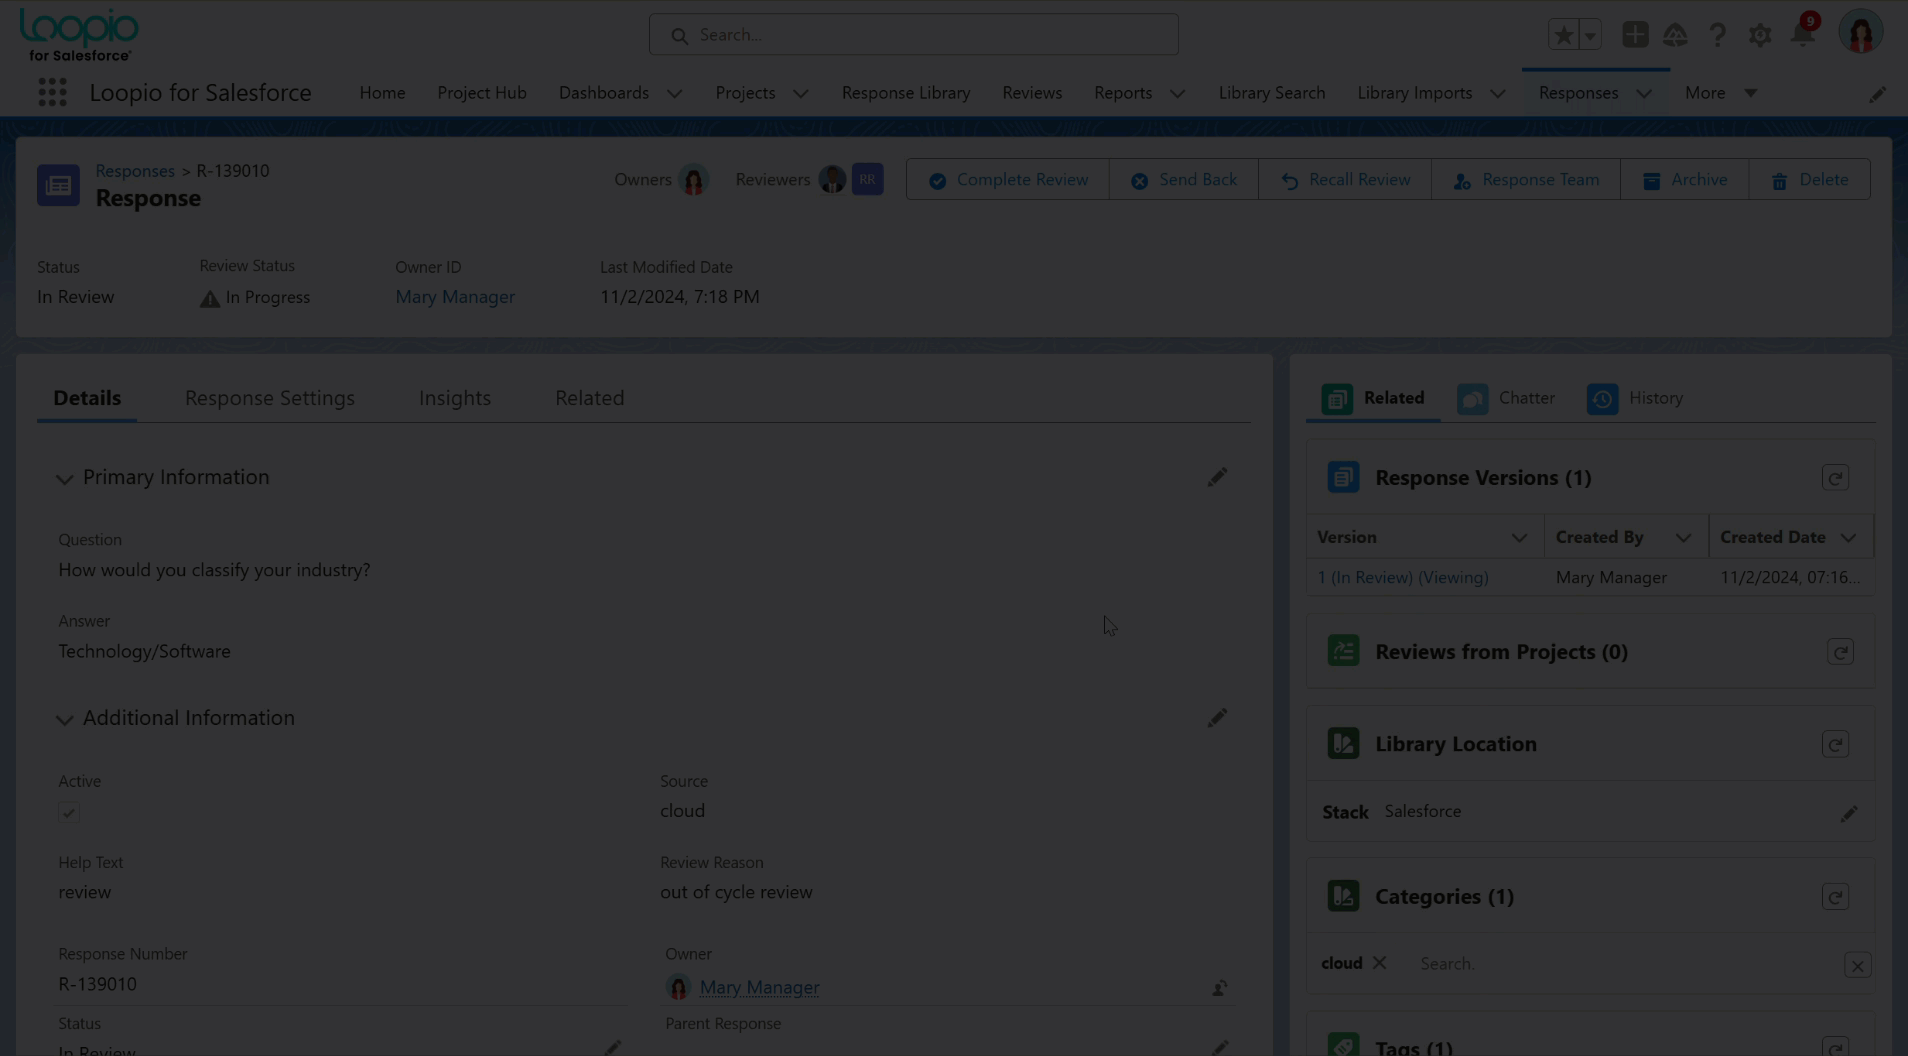
You can submit the Response/Response Version for approvals and provide comments (optional) in the Submit For Review pop up screen. Once submitted, the system will display the Complete Review, Send Back, Archive and Delete buttons on the top right header panel. The Status and Review Status will be updated to In Review and In Progress respectively.
Ideally, the Response that has to be sent for review should not be Published or Archived.
Click to enlarge
If you add the Review Status field from the Field Set, the field will always appear on the highlight panel.
If you did not add the Review Status field from the Field Set, you must configure the Enable Out of Cycle Review setting in Custom Metadata.
When you set the Enable Out of Cycle Review to false, the Review Status field on the highlight panel is hidden.
When you set the Enable Out of Cycle Review to true, the Review Status field appears on the highlight panel.
The Review Status field will only appear when
the Response is in Draft, In Review or Ready For Publish status, and
the Response Version with all the statuses.
Click to enlarge
To Complete or Send Back the submitted request
Once the request is submitted, the reviewers will receive a review notification so that they can complete or send back the submitted request through the Complete Review and Send Back buttons appear on their respective login. Follow the below steps to complete or send back the submitted response.
Login into the application.
Go to Notification icon and click the review request received for approval.
You will be redirected to the approval page.Click the Response ID link to navigate to the response record for review.
Click the Complete Review or Send Back button.
If the first reviewer complete the review, the request will be sent to the second reviewer for approval. If the first reviewer clicks the send back, the request will be Sent Back to the owner for necessary changes.
If reviewer(s) Complete their requests:
The Response Status on the Response will be updated as Completed.
The Status on the Response will be updated as Ready for Publish.
If reviewer(s) Send Back their requests:
The Response Status on the Response will be updated as Sent Back.
The Status on the Response will be updated as Draft.
Click to enlarge
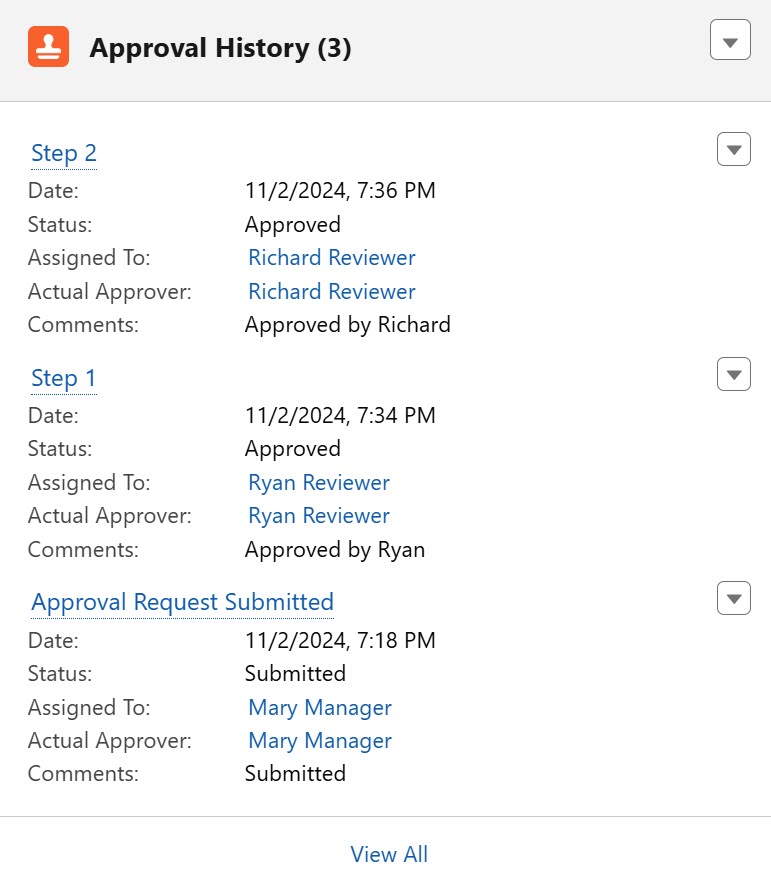
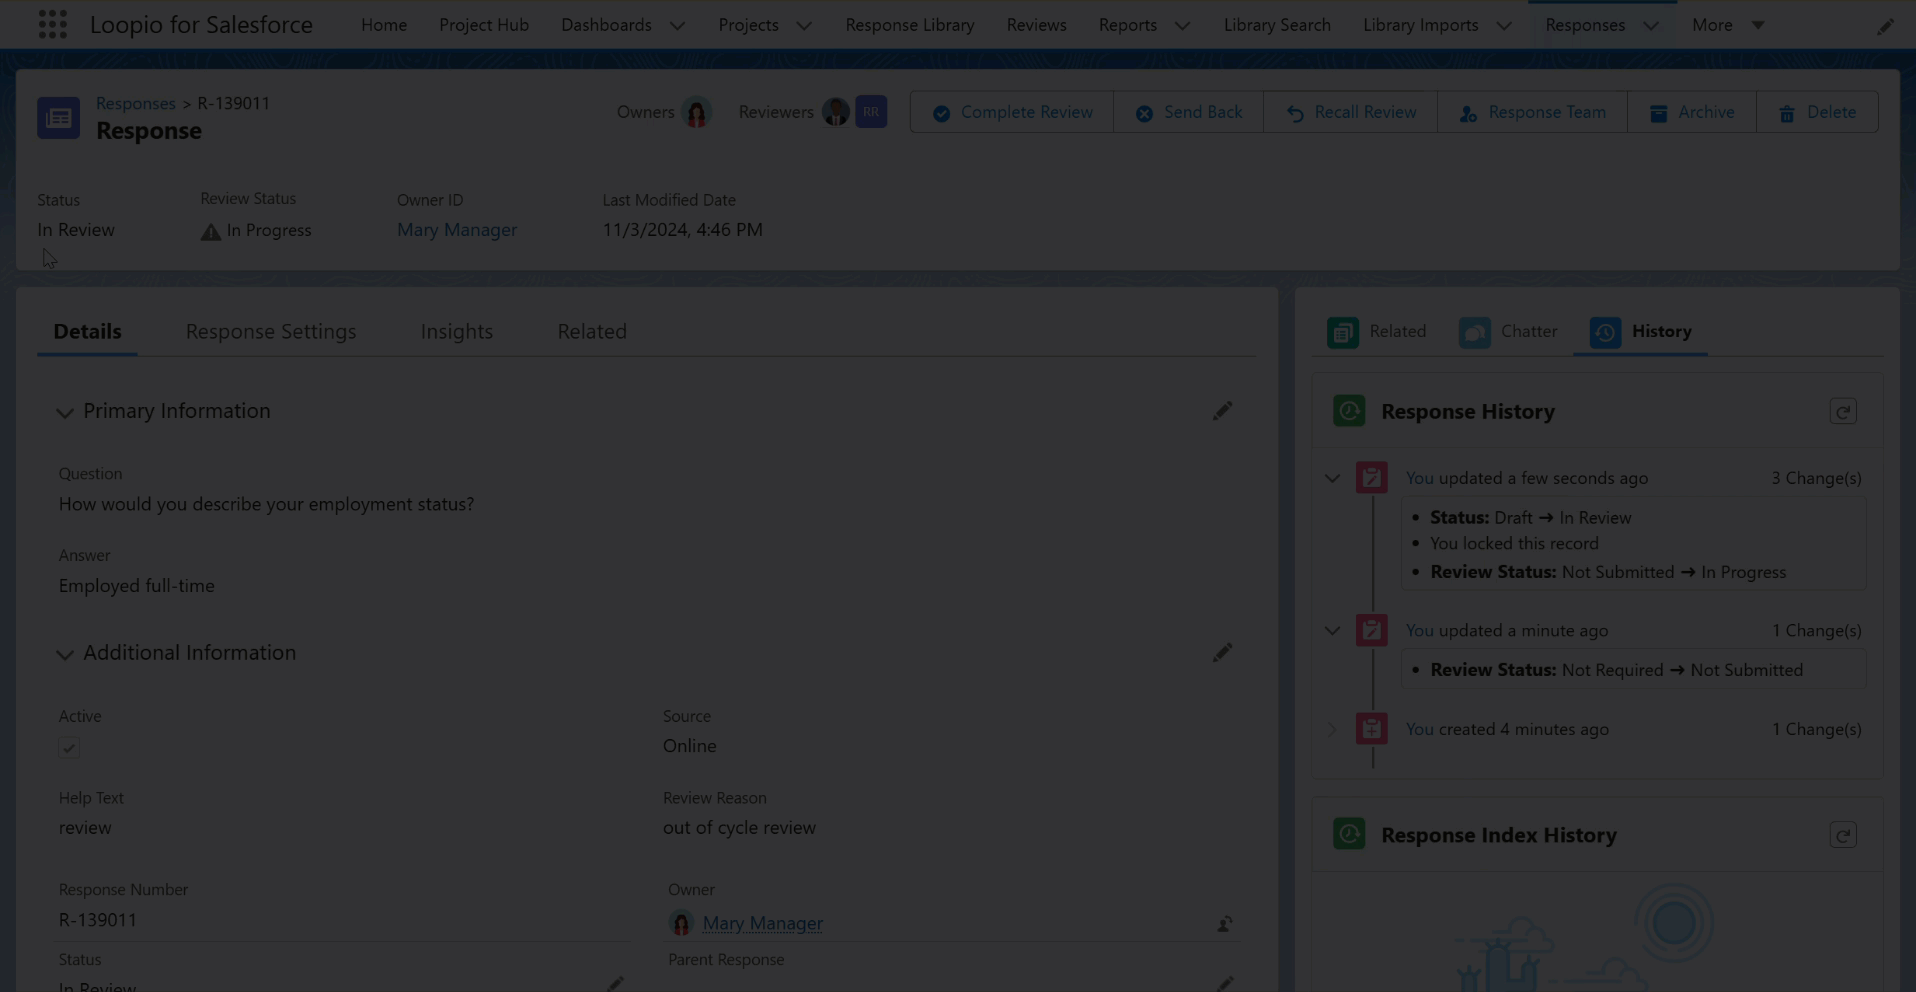
You can see the Review History of the Response under the History tab on the Response and/or Response Version page, which helps you to track the status of the request.
The Review History section does not show any approval related actions.
Click to enlarge
To Recall the submitted review request
After submitting the Response or Response version, you (the owner) can recall the response submitted for the review request using Recall Review button. This button appears next to the Send Back button in the header section when the response is submitted for review. You cannot recall the completed or sent back review request. The following are the steps to recall the submitted response:
Go to the Response.
You can see the Status and Review Status as In Review and In Progress, respectively.Click the Recall Review button.
Add the details in the Comments text box and click Recall Review button.
The added comment will be shown in the Review History section, and the submitted review request will be recalled.
When the review request is recalled successfully, the fields in the Response will be updated as per the Recall Actions configuration in the Salesforce Approval Process.
For example:
Status to Draft
Review Status to Review Required
Recall Review button is visible to all users, but only the owner and system admin have the access to recall the review request.
The system will display an error message if a user with limited access clicks the Recall Review button.
Click to enlarge
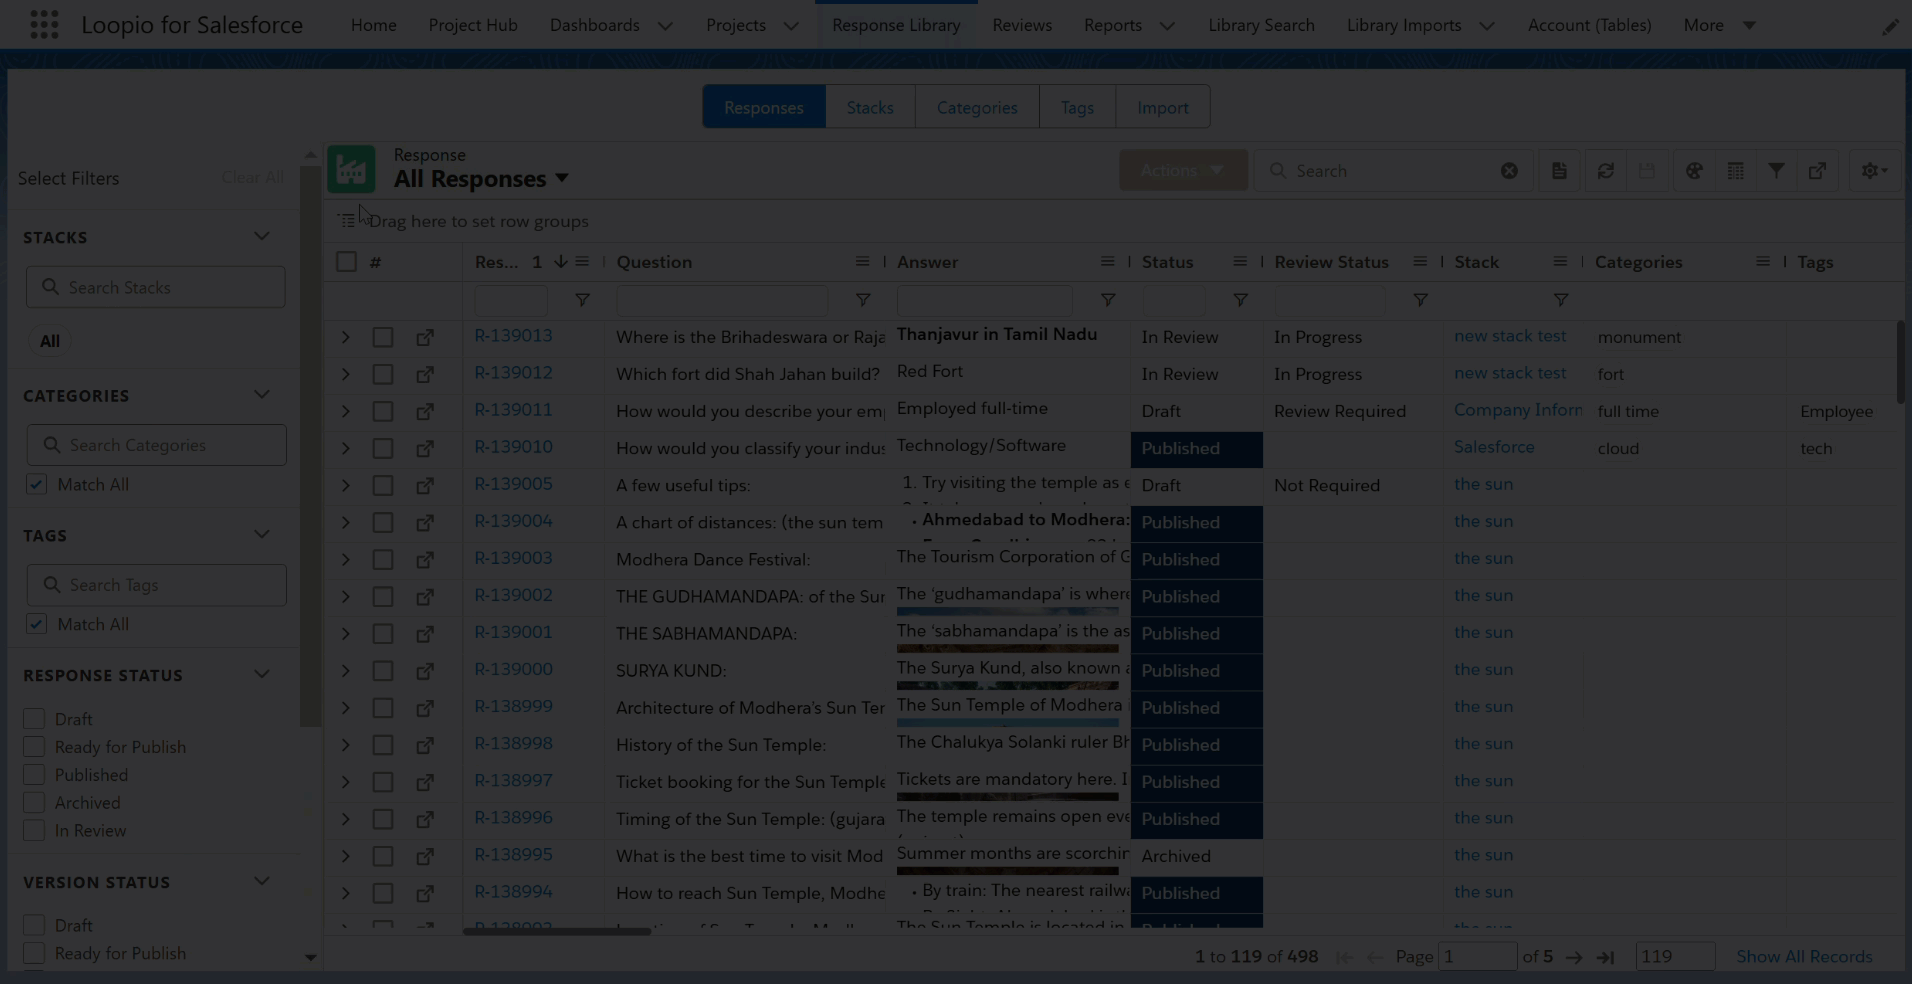
Mass Recall from Table Action
You can mass recall the Response(s) submitted for the review request in the Table’s View using Recall Review button. This is available under the Actions drop down on the Response Library page. The following are the steps to recall the submitted response from Table’s view:
Go to the Response Library > Responses tab.
Select one or more Response(s) from the records list.
Among the selected Responses, only the applicable records will be processed. The Status and Review Status of the selected Responses should be In Review and In Progress, respectively.Click the Recall Review button from the Actions dropdown.
Add the details in the Comments text box and click Recall Review button.
The added comment will be shown in the Approval History section, and the submitted review request will be recalled.
Only the Response owners (added to the Response Team) have the ability to recall the review request(s). When other users request for Recall review, the system will display an error message with a disabled Recall Review button in the pop up.
When the review request is recalled successfully, the fields in the Response will be updated as per the Recall Actions configuration in the Salesforce Approval Process.
For example:
Status to Draft
Review Status to Review Required
Click to enlarge
To publish the approved Response
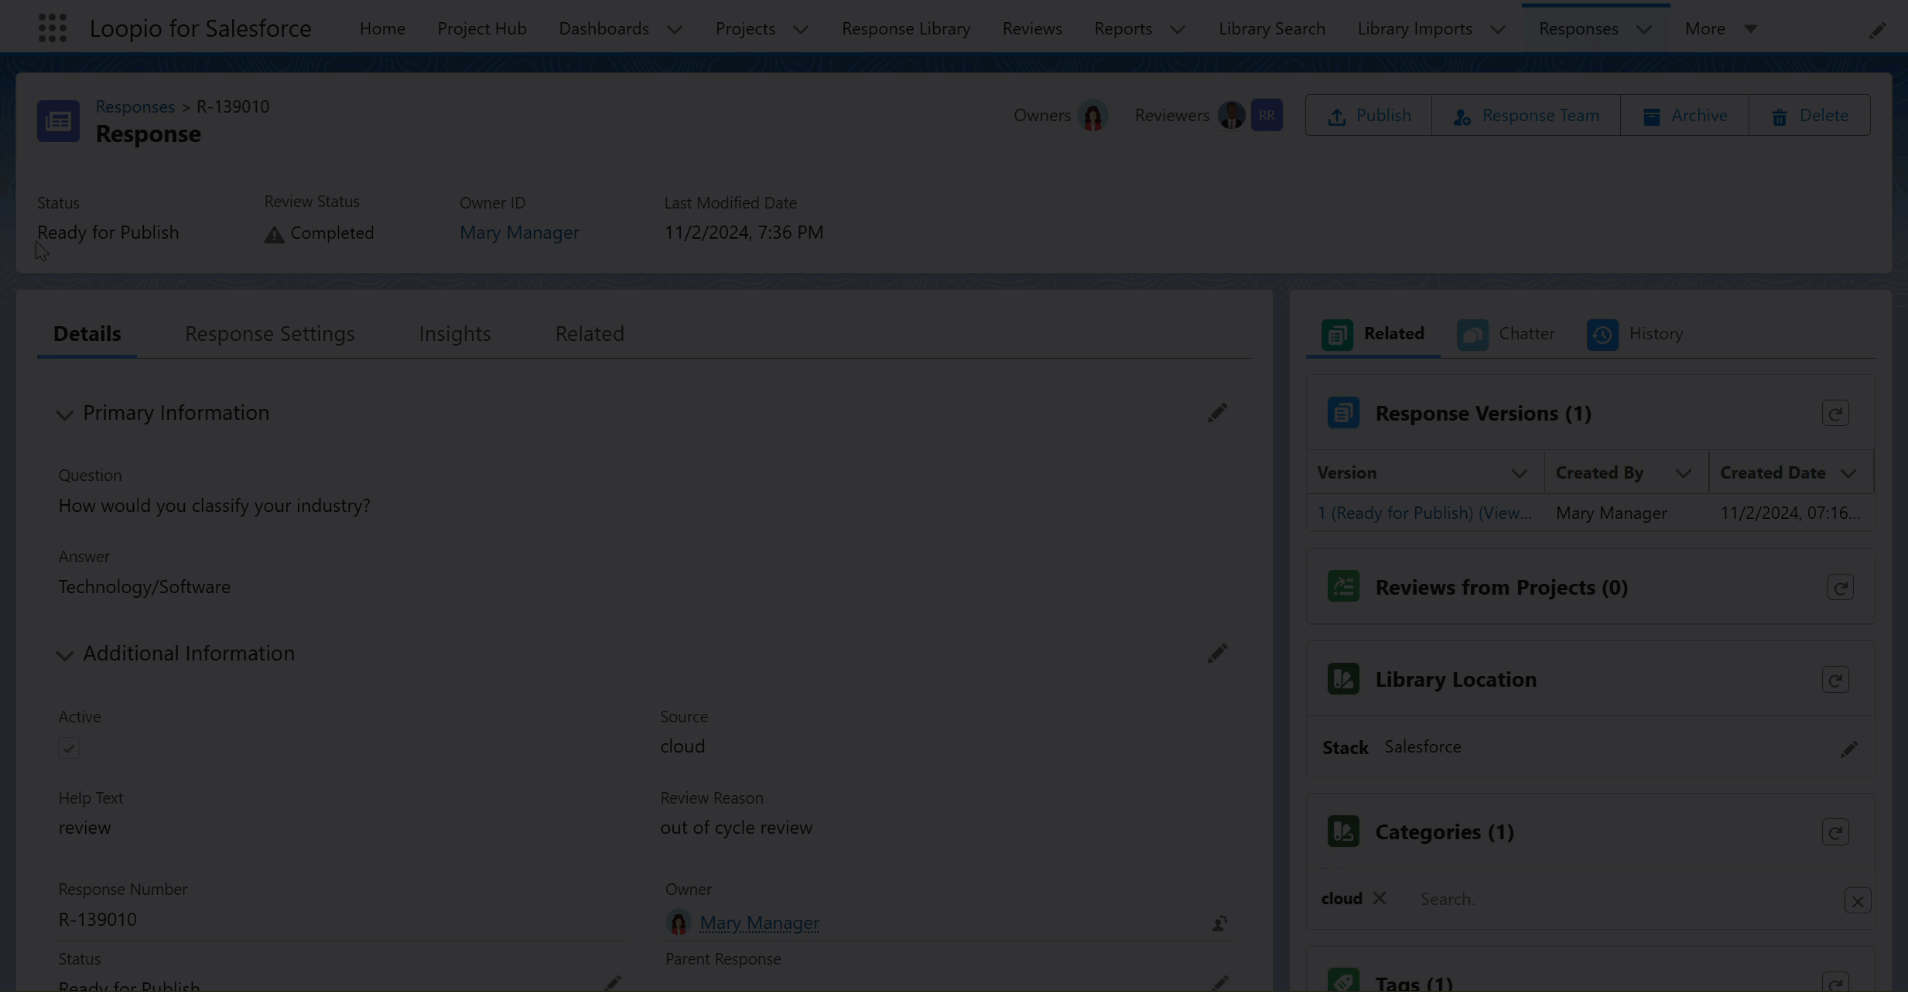
Once the response and/or response version is reviewed by the Reviewer, the owner can publish the record to the Response Library. The following are the steps to publish the approved response:
Go to the Response.
You can see the Status and Review Status has been updated to Ready for Publish and Completed respectively.Click the Publish button.
Add the details in the Comments text box and click Publish button.
You can search and find the published record on the Response Library.
Click to enlarge
The visibility of the Submit For Review, Complete Review and Send Back buttons will depend on the Status and Review Status fields, so you must update them accordingly in Approval Process actions.