Cycle Review
In this process, the system will automatically submit the eligible Response(s) for the review cycle. This also helps to automatically track the Responses that are pending and submit them periodically for review cycle based on the business requirements.
Org Level Settings
You need to enable the following settings to directly submit the eligible Response record for the review cycle as per below GIF:
You need to set the configuration Auto Submit For Review Cycle to true in Custom Metadata Types > Loopio for Salesforce Configuration and/or Response record.
You should have an active Salesforce Approval Process in your org.
Manage Settings:
User can configure the Salesforce Approval Process from Setup > search and select Approval Processes > choose a desired Object from the drop down > select an active Approval Process name and make the required changes as per the business needs.
Response Record Level Settings
Auto Submit For Review Cycle:
When the Response is eligible (based on fields) and if Auto Submit For Review Cycle is true on the Response record, then Batch Job is triggered and it will automatically submit the Response for review cycle.
Next Review Date:
The Next Review Date field will determine when the Responses should go for review cycle. The Next Review Date field can be populated manually by the user or using automations. (Flow or Trigger)
Batch Job
You can have one batch job (ResponseReviewCycleSchedule) that runs behind the application, which will scan all the Responses that are due for review cycle.
System admin can schedule above batch using ResponseReviewCycleSchedule Apex class. The frequency of this batch depends on the customer requirement (Loopio suggests to keep the batch frequency = Daily).
The batch can be setup by following the steps below:
Go to Setup > search and select Apex Classes > Schedule Apex > Edit and Save the new job.
Lets us look at the below scenarios to understand the workflow of review cycle process with an example:
These are the eligibility criteria fields mentioned in the below scenario:
Status = Published
Review Status should not be Submitted (or) In Progress
Next Review Date = Today’s Date
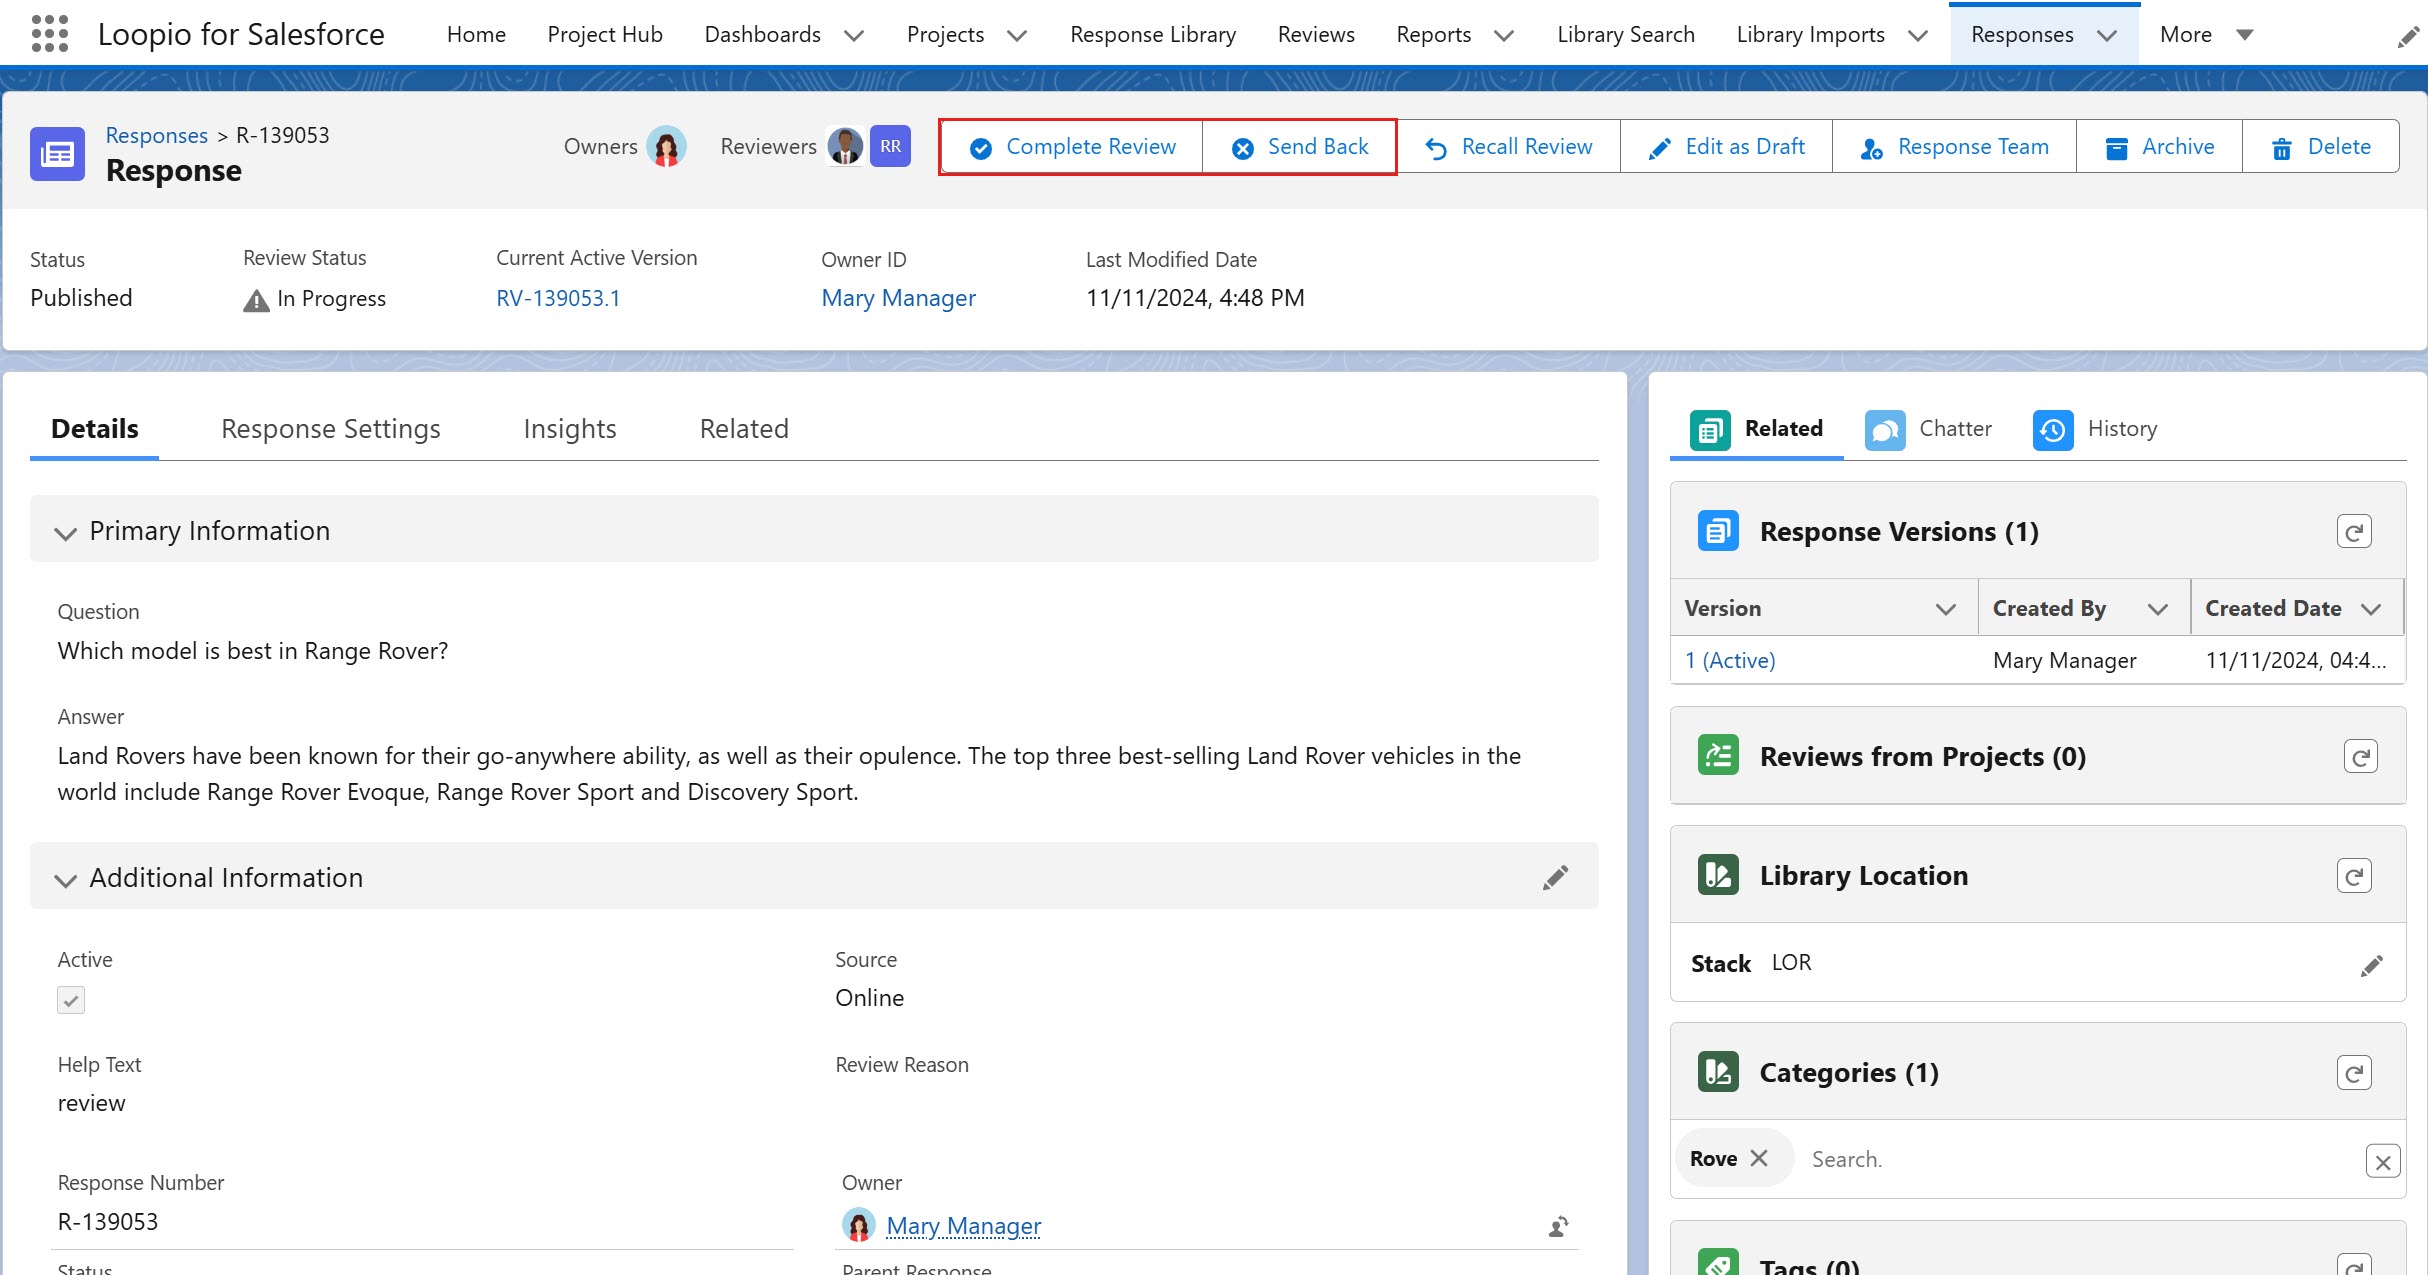
When the Auto Submit For Review Cycle is set to true on the Response record, the Response is Eligible for the review cycle and the Batch Job gets triggered, the system will automatically submit the response for the review cycle and display two new buttons as shown below:
Complete Review
Send Back
Click to enlarge
Complete Review
The reviewer can go to Notification icon and click the review request for approval and complete the review request by clicking on the Complete Review button visible on their respective login.
Send Back
The reviewer can notify the changes need to be made on the Chatter tab as a Post (mentioning the Response Owner) and click the Send Back button from the header panel, add the changes in the comments (optional), and click the Send Back button in the pop-up to return the review request to the owner for a revision.
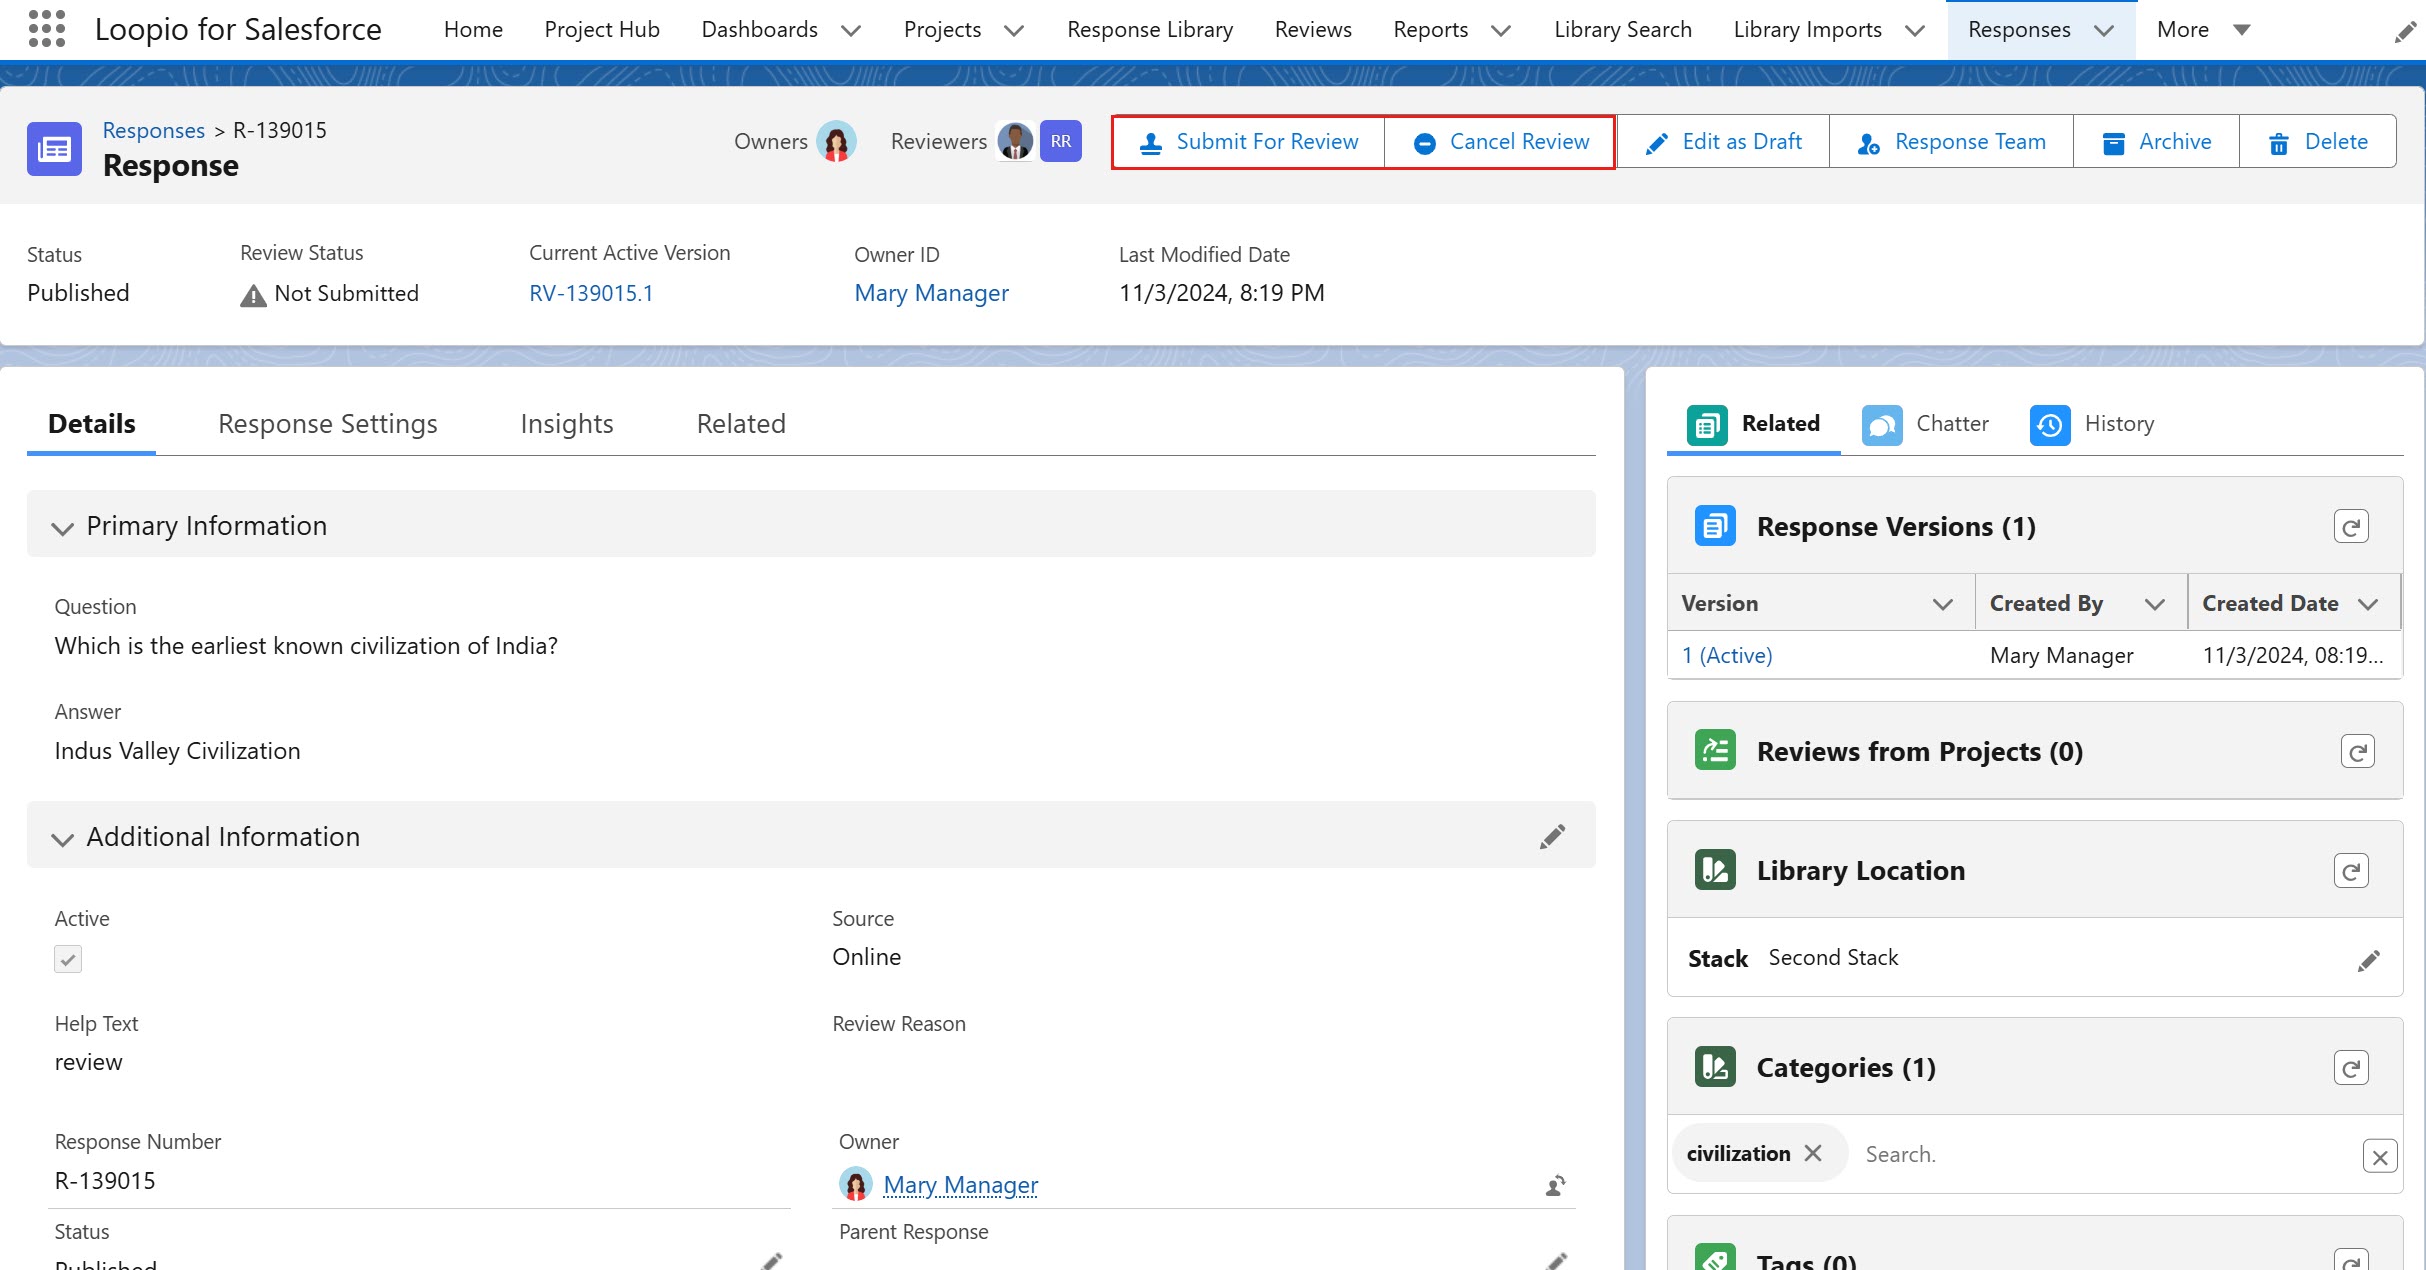
If the Auto Submit For Review Cycle is set to false on the Response record, the Response is Eligible for the review cycle and the Batch Job gets triggered, the system will auto-mark the Marked for Cycle Review field to true on the Response record that indicates the Response is due for the review cycle. Now, you can manually decide and choose an option from the below buttons:
Submit For Review
Cancel Review
Click to enlarge
Submit For Review
You can manually submit the review request by clicking on the Submit For Review button if the Response is Eligible for the review cycle.
Click to enlarge
Cancel Review
You can cancel the review request if the review process is no longer needed, click the Cancel Review button on the header panel to cancel the process.
Click to enlarge
Batch Job will consider the Responses based on the below criteria:
If the Response is already in the review cycle or the Marked for Cycle Review flag is enabled, the batch job will ignore the response.
If the Response is not eligible or not due for the review cycle, the batch job will ignore the response.
If the Response is eligible for a review cycle, you can follow the above example scenario.
Loopio recommends you to update the Next Review Date field either on Initial Submission Actions or from Final Approval/Rejection Actions based on your requirement in the Approval Process. You can set this field based on frequency or other parameters using formula or response level field.
The visibility of Complete Review, Submit For Review, and Cancel Review buttons will depend on Status and Review Status fields, so you must update them accordingly in Approval Process actions.
You can add the existing out-of-the-box Actions available in the RFx Package while creating the Approval Process.
Review Cycle History
When a review cycle is initiated, the application tracks the history by creating a Review Cycle History record (with the information mentioned in the following table) for each Response record that is eligible for the review cycle.
To view the Review Cycle History:
Go to the Response record, click on Related tab and scroll down to the bottom of the Response page to see the Review Cycle History. Click on the Review Cycle History Name/ID to see the record’s information mentioned in the following table.
If you are unable to view the Review Cycle History on the Response page, contact your System Administrator to add it to the Response layout of the record.
Field Label | Description |
|---|---|
Response | Displays the ID of the specific Response record. |
Auto Submit For Review Cycle | Displays the status of the Auto Submit field checkbox whether it is checked or not at the time of record creation. |
Review Cycle Start Date | Displays the created Date and Time of the Review Cycle History record. |
Review Start Date | Displays the Date and Time of the record submitted for Salesforce Approval Processes. |
Review Started By | Displays the name of the user who submitted the record for Salesforce Approval Processes. |
Review Cancelled Date | Displays the Date and Time of the record when it is cancelled or Cancel Review button is clicked. |
Review Cancelled By | Displays the name of the user who cancelled the review record. |
Comments | Displays the notes captured by the user during the cancel review. |
Click to enlarge
Reviewer's action on “In progress” response
The Reviewers can make changes to the review request or they can ignore if it is not necessary. As a Reviewer, you should consider the following points when the review cycle is already in progress.
No Changes Required:
You (Reviewer) can go ahead and complete the review request if you do not want to make changes to the Response.
Changes Required:
If you want to make changes to the Response once you received the review request, you can follow one among the two procedures mentioned below:
Procedure 1:
The Reviewer should make the necessary changes to the Response as per the below procedure:
Open the Response record.
Click the Edit as Draft button to create a Draft Response Version from the already Published Response.
Make the required changes to the draft version and click the Save button.
Click the Publish button.
You can see the updated Response Version gets published.Click the Complete Review button.
Reviewers with the Custom Publish permission can only see the Publish button on the Response Version.
Click to enlarge
Procedure 2:
Reviewer(s) can notify the changes to Owner by adding the necessary changes on the Chatter tab as a Post (mentioning the Response Owner) and click the Send Back button from the header panel, add the changes in the comments (optional), and click the Send Back button available on the pop-up.
Click to enlarge
Owner’s Action:
The Owner should make necessary changes to the Response as per the below procedure:
Open the Response record.
Click the Edit as Draft button to create a Draft Response Version from the already Published Response.
Make the required changes to the draft version and click the Save button.
The application runs the batch job and displays the Submit For Review button.Click the Publish button to publish the updated response version.
Click the Submit For Review button.
The Reviewer will receive a review request notification for the updated response version.Reviewer should open the updated response version and click the Complete Review button.
The Reviewer will provide his approval for the response version.
Click to enlarge
During the above process, if the review has been setup on the response version, the Implementation team is required to take care whether to go through the review on the Response Version or not.
To recall the submitted Review Request
After the Response or Response version is submitted, you (the owner) can recall the response submitted for the review request using Recall Review button. This button appears next to the Send Back button in the header section when the response is submitted for review. You cannot recall the completed or sent back review request. The following are the steps to recall the submitted response:
Go to the Response.
You can see the Status and Review Status as Published and In Progress, respectively.Click the Recall Review button.
Add the details in the Comments text box and click Recall Review button.
The added comment will be shown in the Review History section, and the submitted review request will be recalled.
When the review request is recalled successfully, the fields in the Response will be updated as per the Recall Actions configuration in the Salesforce Approval Process.
For example:
Marked for Cycle Review to True
Review Status to Review Required
All users can view the Recall Review button, but only the owner and system admin have the access to recall the review request.
The system will display an error message if a user with limited access clicks the Recall Review button.
Click to enlarge
Mass Recall from Table Action
You can mass recall the Response(s) submitted for the review request in the Table’s View using Recall Review button. This is available under the Actions drop down on the Response Library page. The following are the steps to recall the submitted response from Table’s view:
Go to the Response Library > Responses tab.
Select one or more Response(s) from the records list.
Among the selected Responses, only the applicable records will be processed. The Status and Review Status of the selected Responses should be Published and In Progress, respectively.Click the Recall Review button from the Actions dropdown.
Add the details in the Comments text box and click Recall Review button.
The added comment will be shown in the Approval History section, and the submitted review request will be recalled.
Only the Response owners (added to the Response Team) have the ability to recall the review request(s). When other users request for Recall review, the system will display an error message with a disabled Recall Review button in the pop up.
When the review request is recalled successfully, the fields in the Response will be updated as per the Recall Actions configuration in the Salesforce Approval Process.
For example:
Marked for Cycle Review to True
Review Status to Review Required
Click to enlarge