Giving Users Access to the Loopio Go/No-Go App
Granting Users Permission for the Loopio Go/No-Go App
There are two permission sets available for the Loopio Go/No-Go app in Salesforce:
Go/No-Go Admin: able to configure the Go/No-Go Sections, Questions, and scoring thresholds.
Go/No-Go User: able to see the Go/No-Go button on Opportunities where it has been configured, and see Go/No-Go Submission records.
To grant one of these permission sets to your users, refer to the Salesforce guide [External: Salesforce] Manage Permission Set Assignments.
Placing the Loopio Go/No-Go App on an Opportunity Layout
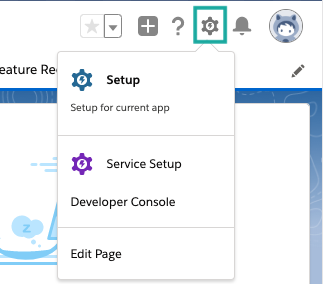
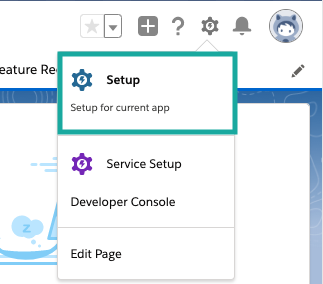
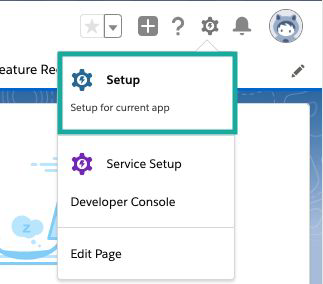
Click the gear icon in the top right of the navigation ribbon on your Salesforce homepage.
Click to enlarge
Click Setup. This will open a new tab in your browser.
Click to enlarge
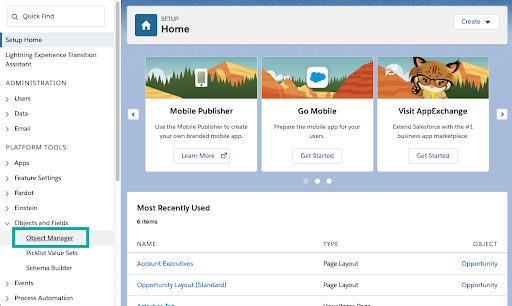
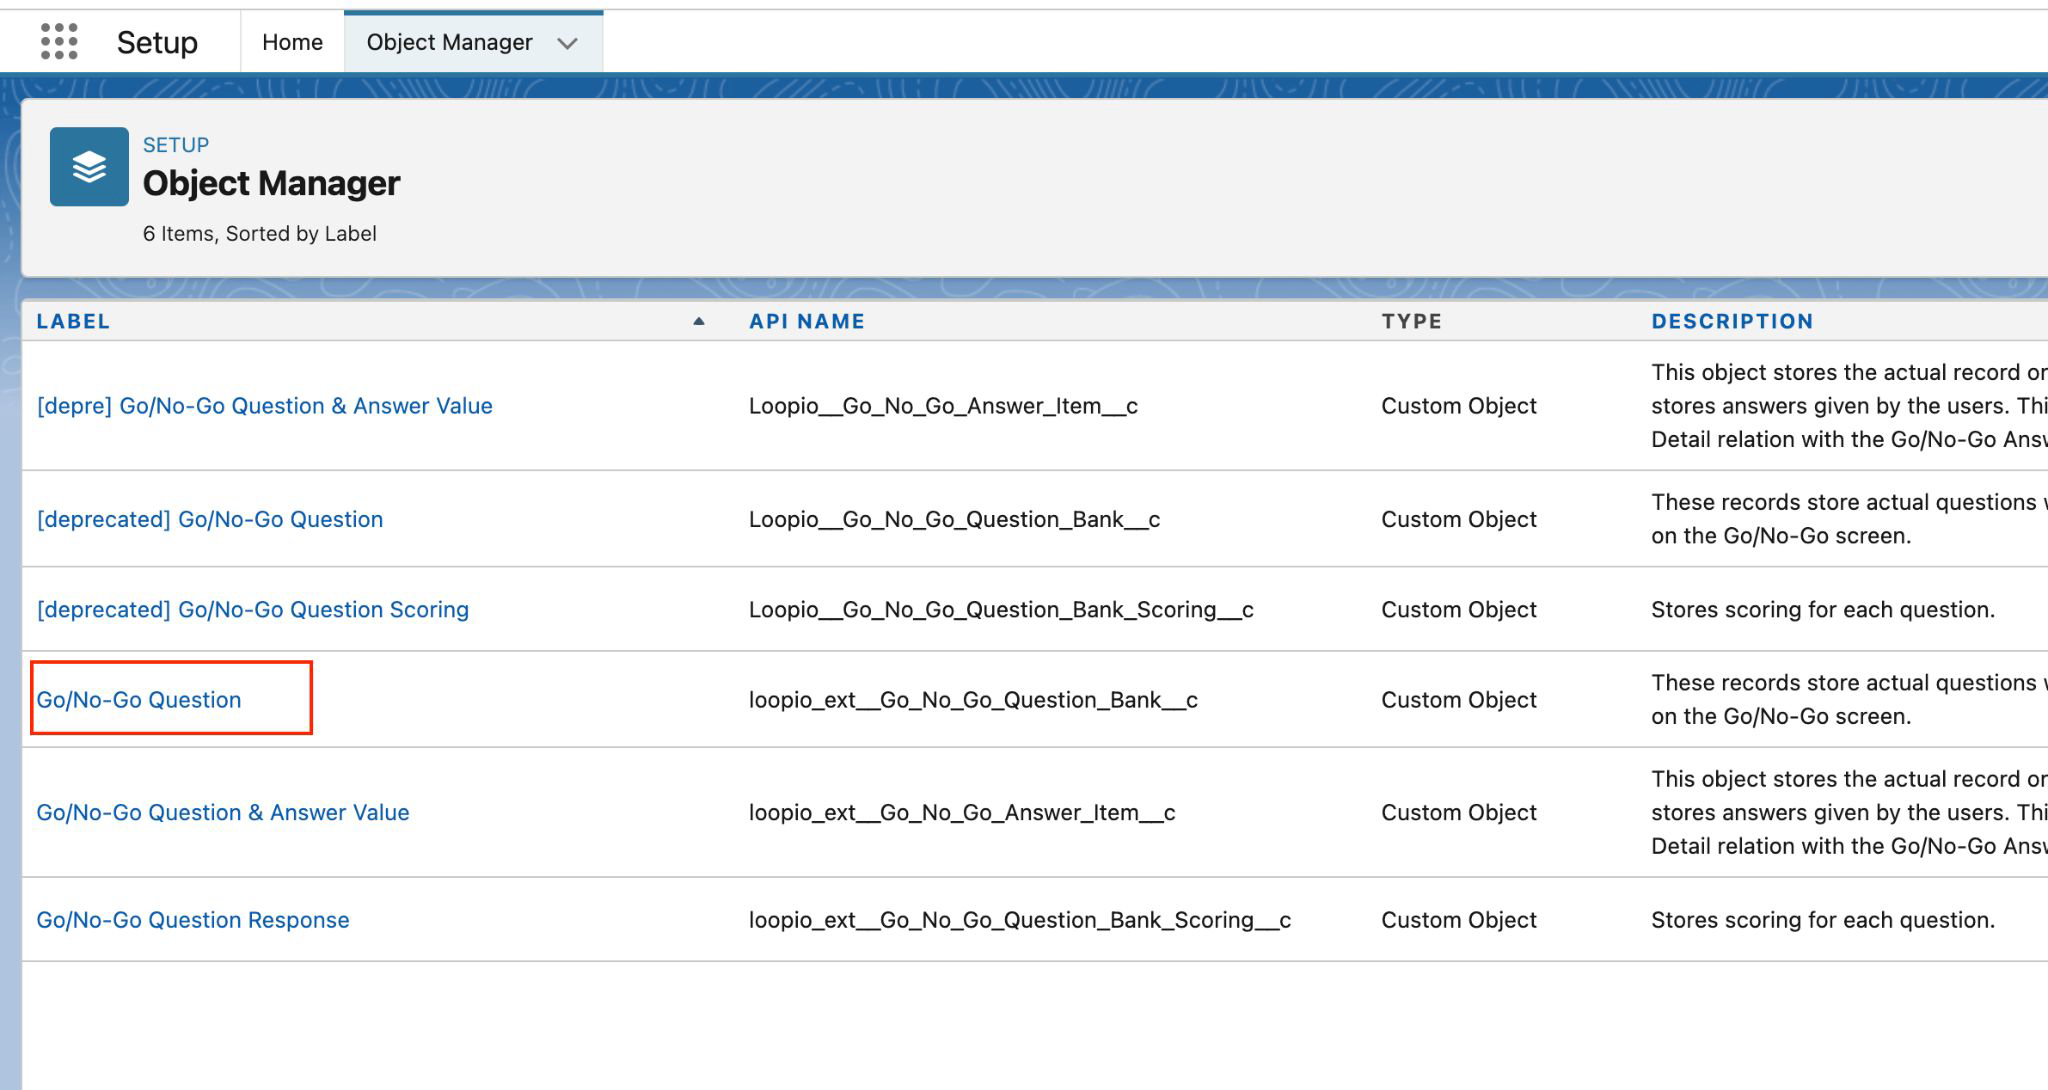
On the far left in the new tab, under PLATFORM TOOLS, select Objects and Fields and then the Objects Manager.
Click to enlarge
Search for and select Opportunity.
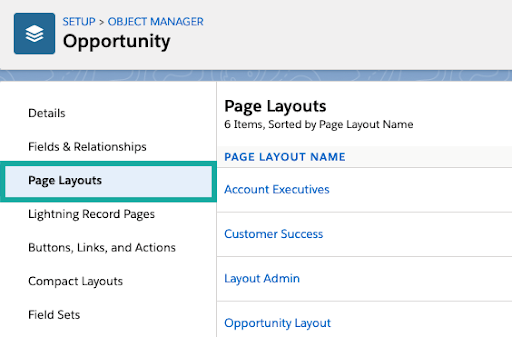
From the left navigation bar, select Page Layouts, and select the page layout you would like to add the Go/No-Go app to.

Click to enlarge
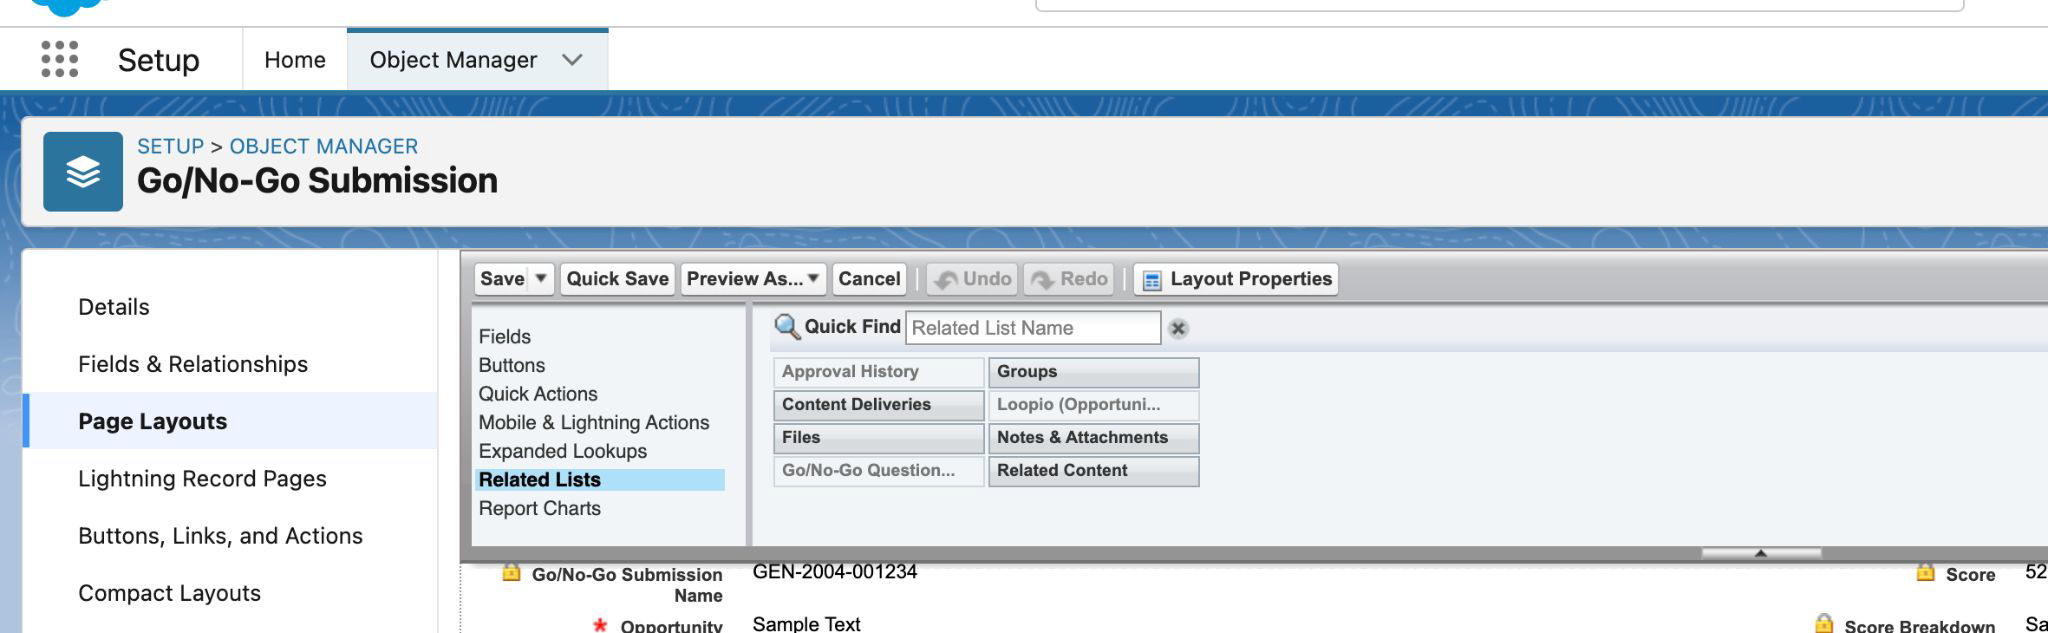
Select Related Lists.
Click and drag the Go/No-Go Submissions tile into the Related Lists section below.
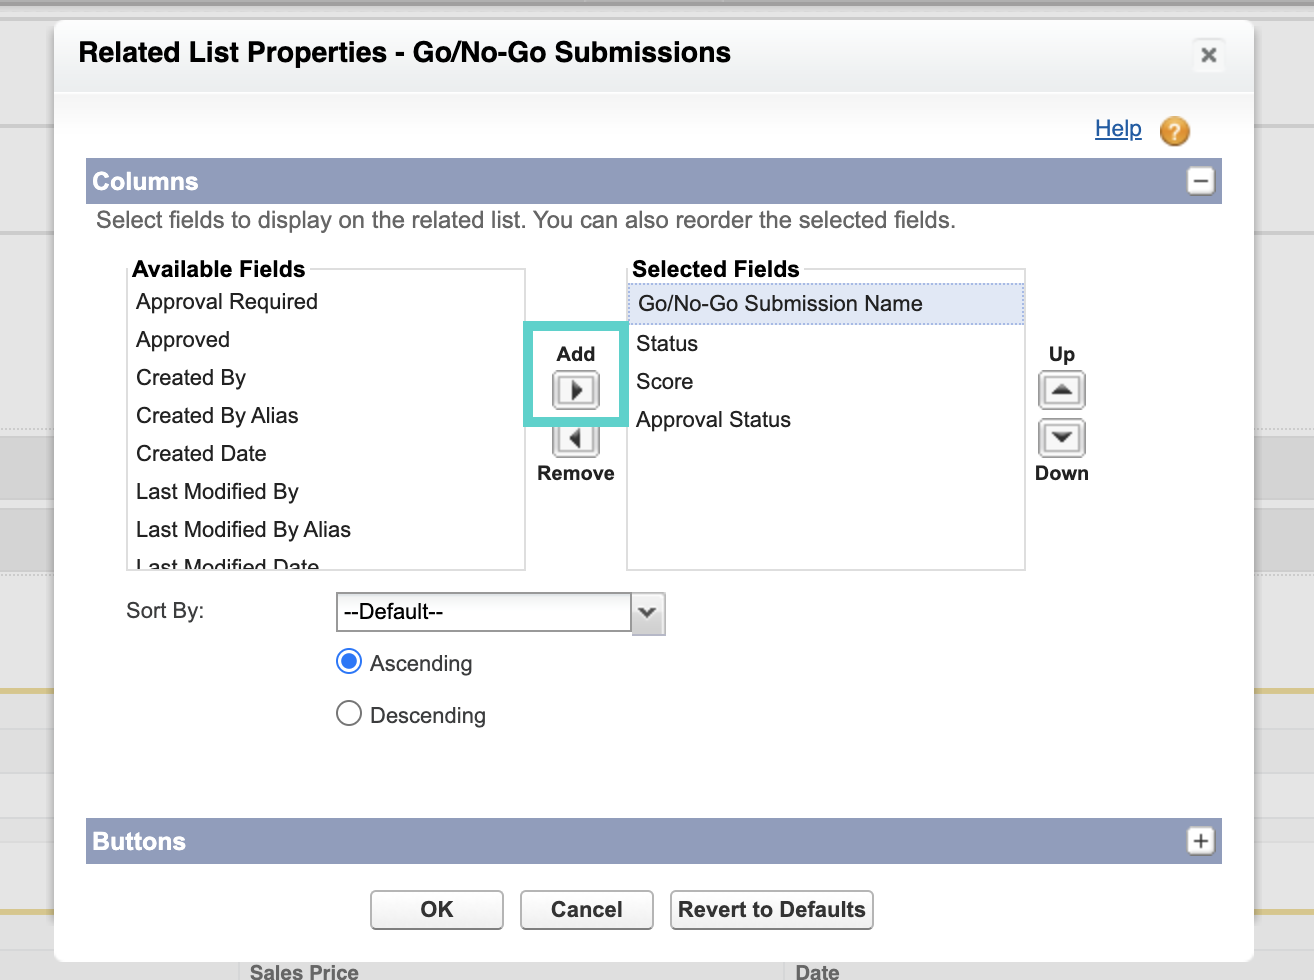
Once the Go/No-Go Submissions Object is on the page, click the wrench icon.
Move all the columns that you would like to make available into the Selected Fields list by selecting a column and clicking the Add button (right arrow).
Recommended Selected Fields:Go/No-Go Submission Name
Status
Score
Approval Status
Click to enlarge
Select Buttons and deselect both New and Change Owner.
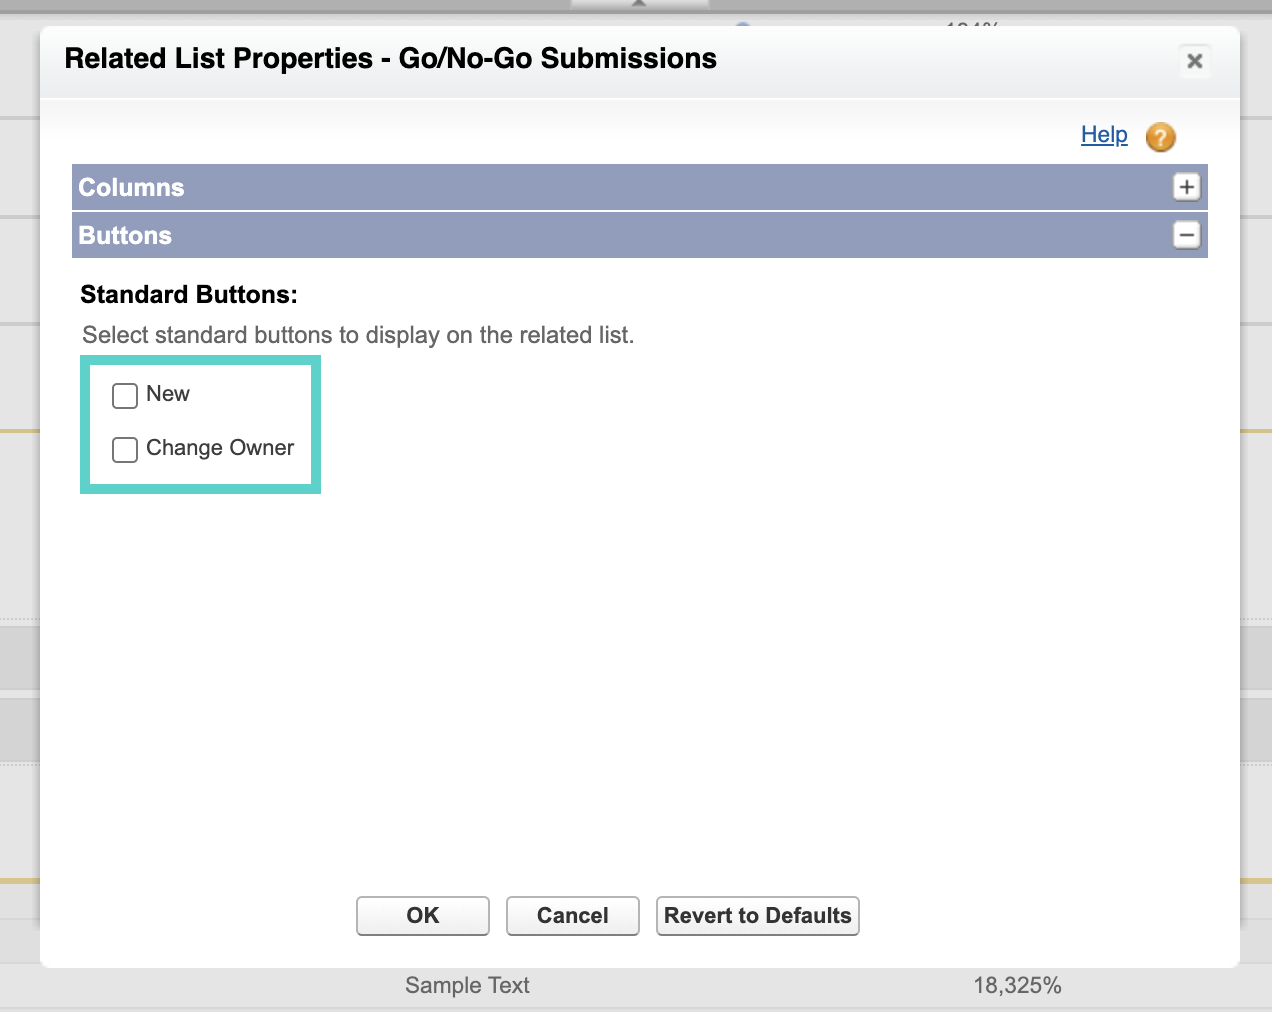
Click to enlarge
Click OK to save the changes to this Layout.
Repeat the above steps for any other Opportunity Layouts where the Loopio Go/No-Go App should appear.
Learn more: Read on to learn more about Configuring the Loopio Go/No-Go App in Salesforce.
Placing the Go/No-Go Button on an Opportunity Layout
Tip: If you are continuing your setup from the steps above (Placing the Loopio Go/No-Go App on an Opportunity Layout), skip to step 5.
After the Loopio Go/No-Go App has been added to your Opportunity Layout(s):
Click the gear icon in the top right of the navigation ribbon on your Salesforce homepage.

Click to enlarge
Click Setup. This will open a new tab in your browser.

Click to enlarge
On the far left in the new tab, under PLATFORM TOOLS, select Objects and Fields and then the Objects Manager.

Click to enlarge
Search for and select Opportunity.
From the left navigation bar, select Page Layouts, and select the page layout you would like to add the Go/No-Go button to.
Click to enlarge
Select Mobile & Lightning Actions.
Add New Go/No-Go Submission and Request Go/No-Go Submission actions in the layout as shown below.
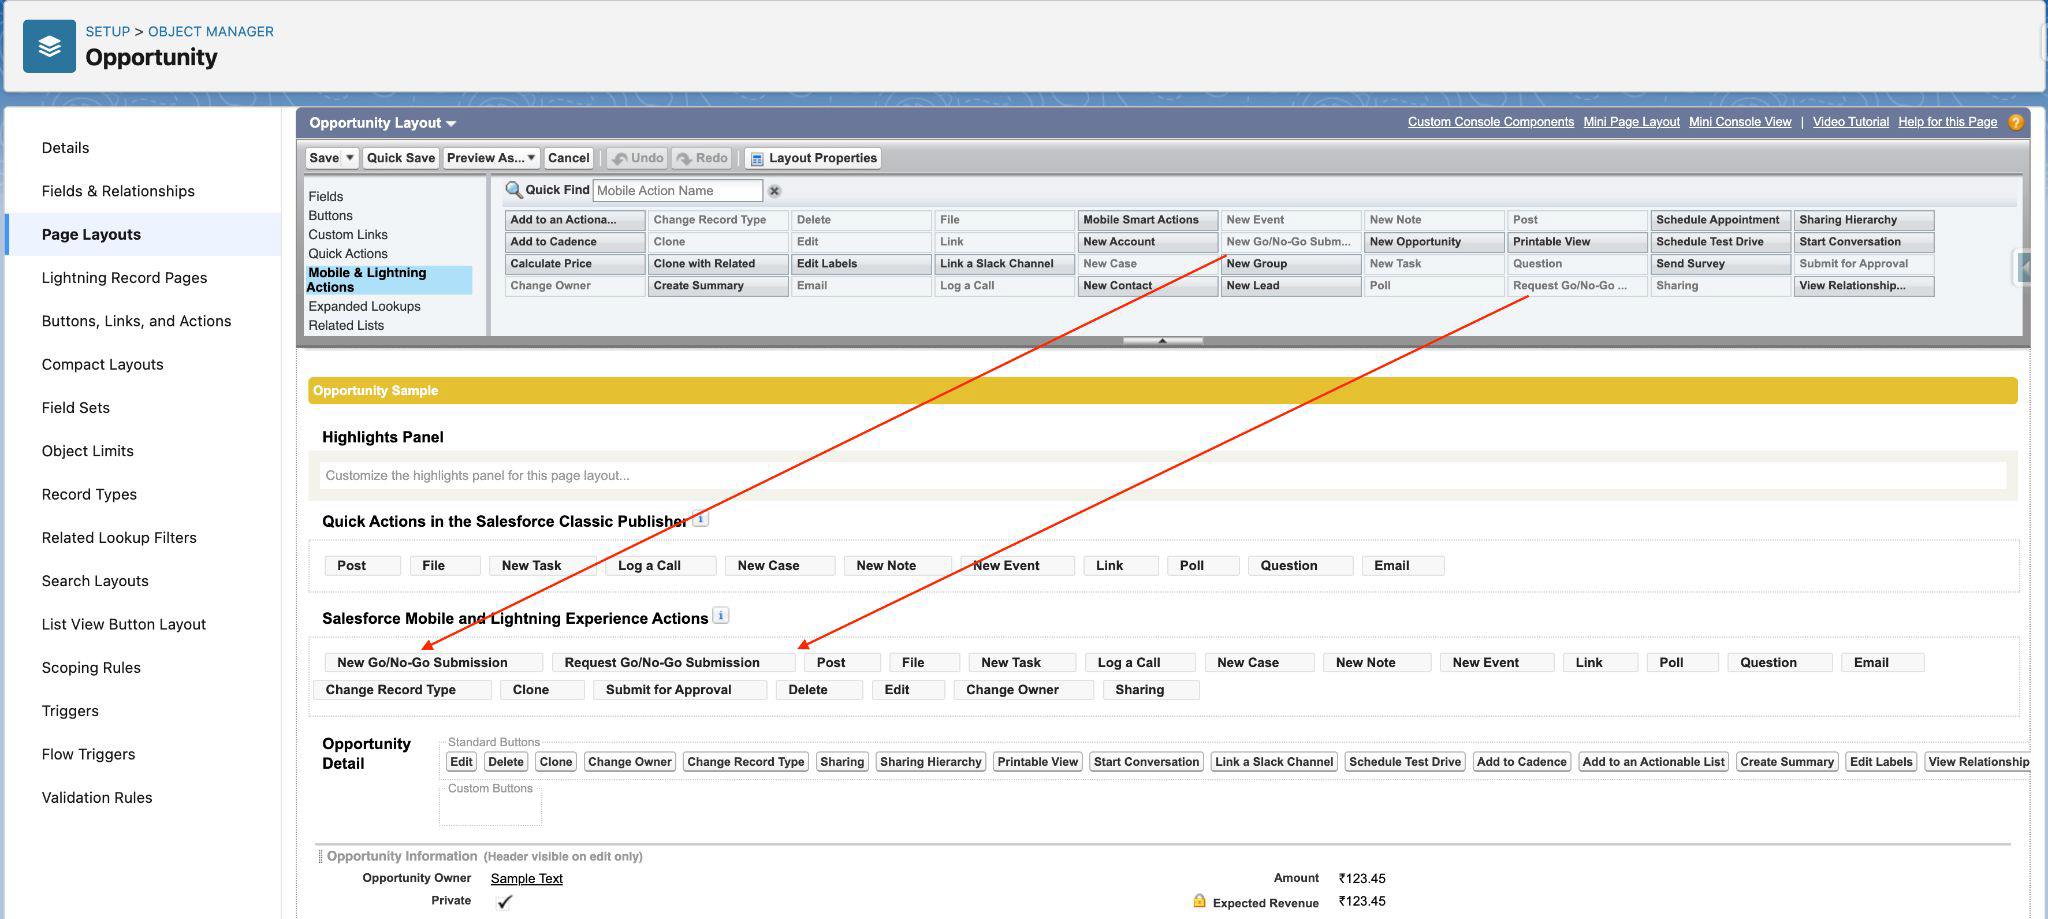
Click to enlarge
Save the Layout changes.
Repeat the above steps for any other Opportunity Layouts where the Loopio Go/No-Go button should appear.
Adding picklist value in Data Type field of Go/No-Go Question object
(Only in case of upgrading from version below 1.9)
Click on Setup.
Click to enlarge
Click on Object Manger. Search for Question and open Go/No-Go Question.
Click to enlarge
Click on Fields & Relationships and click on Data Type.
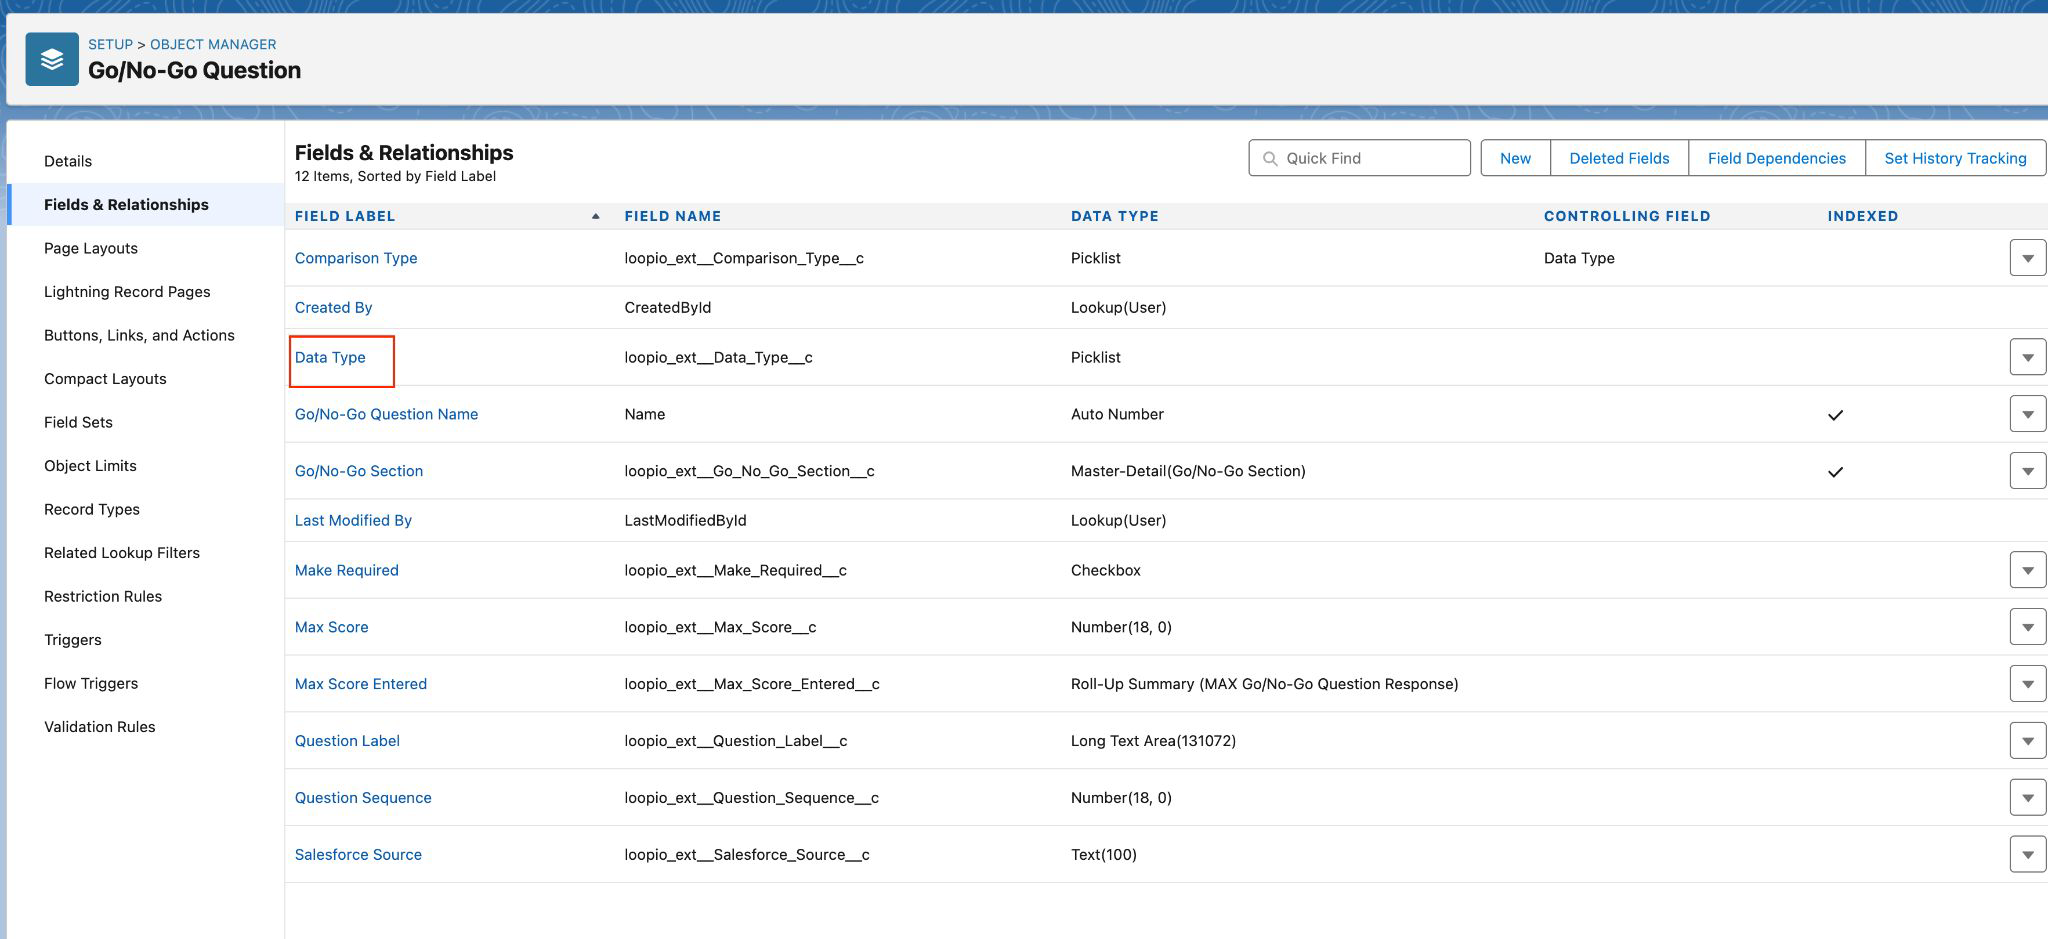
Click to enlarge
Click on New in the values section.
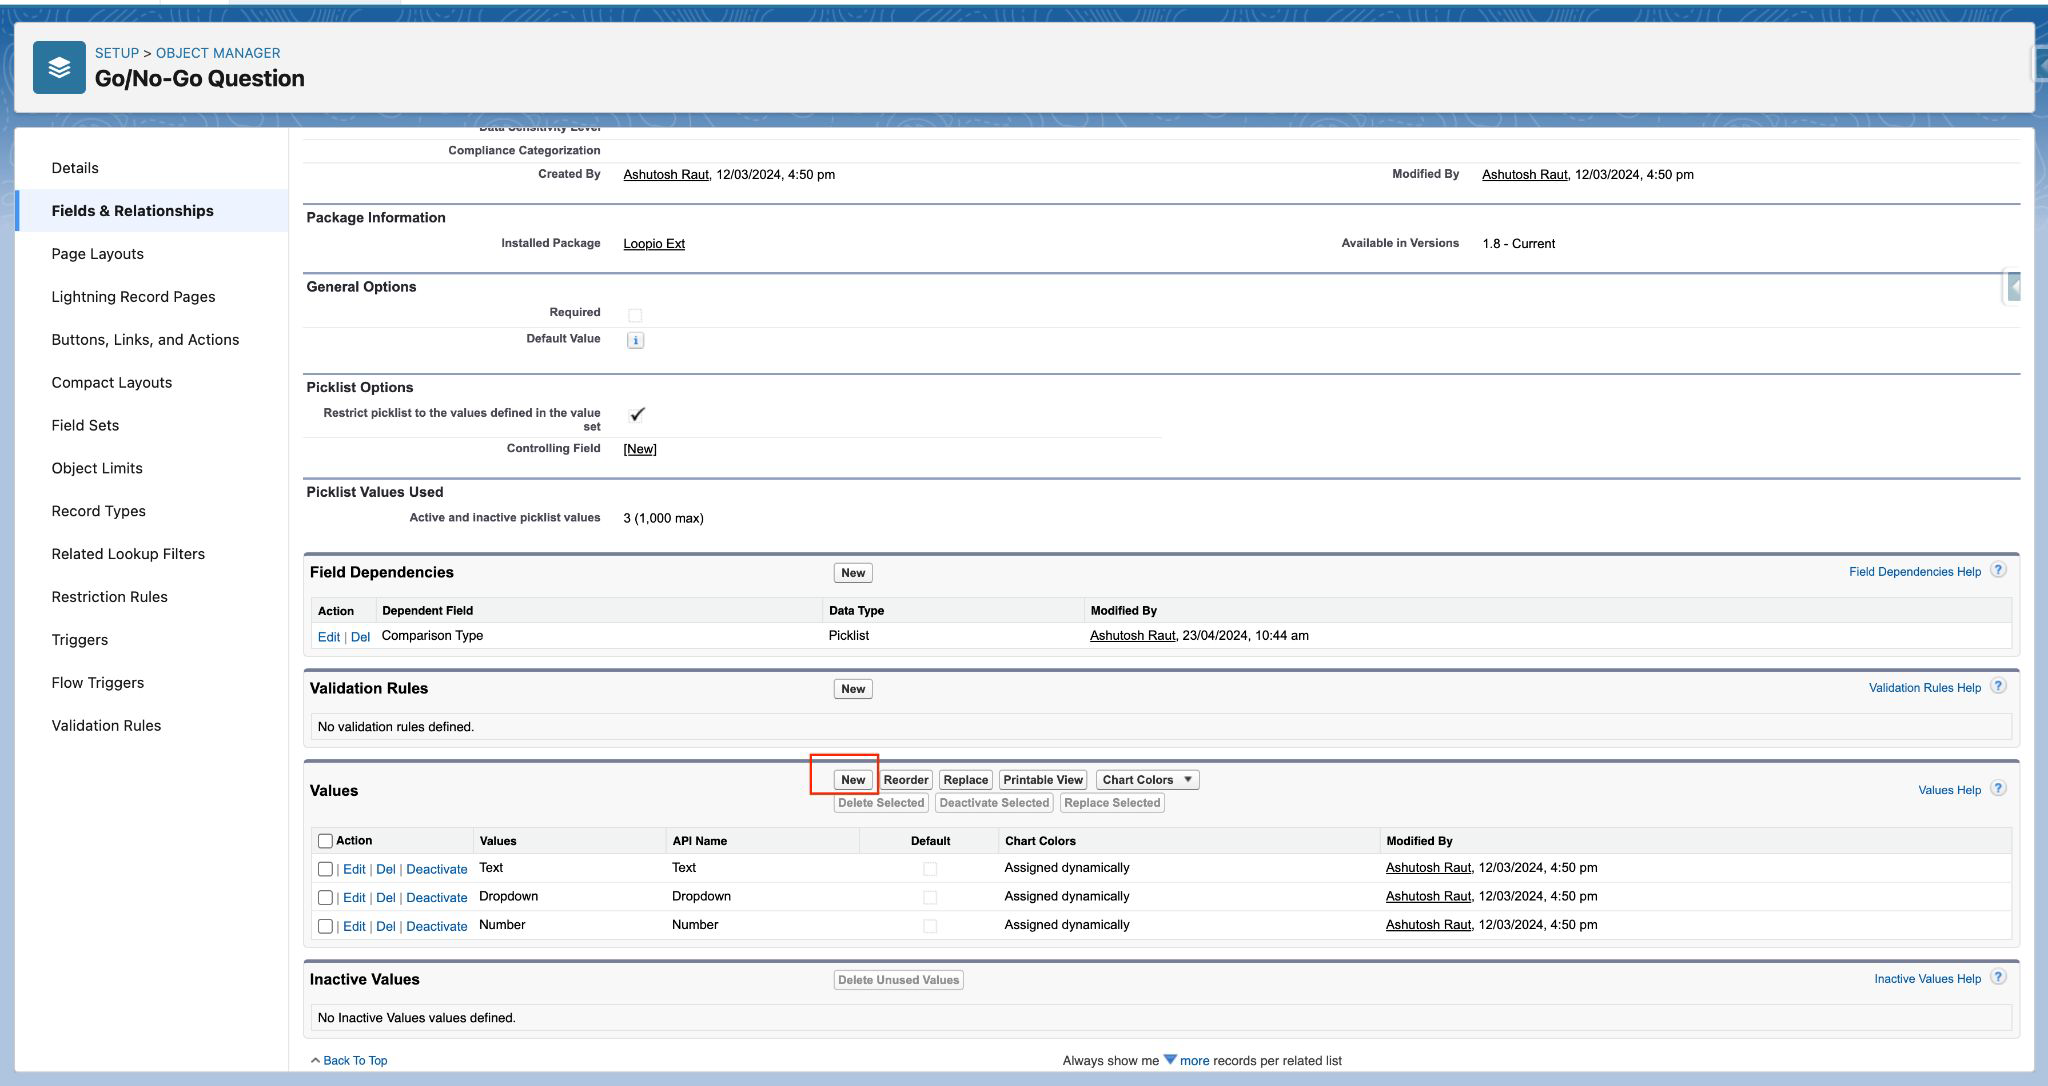
Click to enlarge
Add with value Salesforce Input and click save.
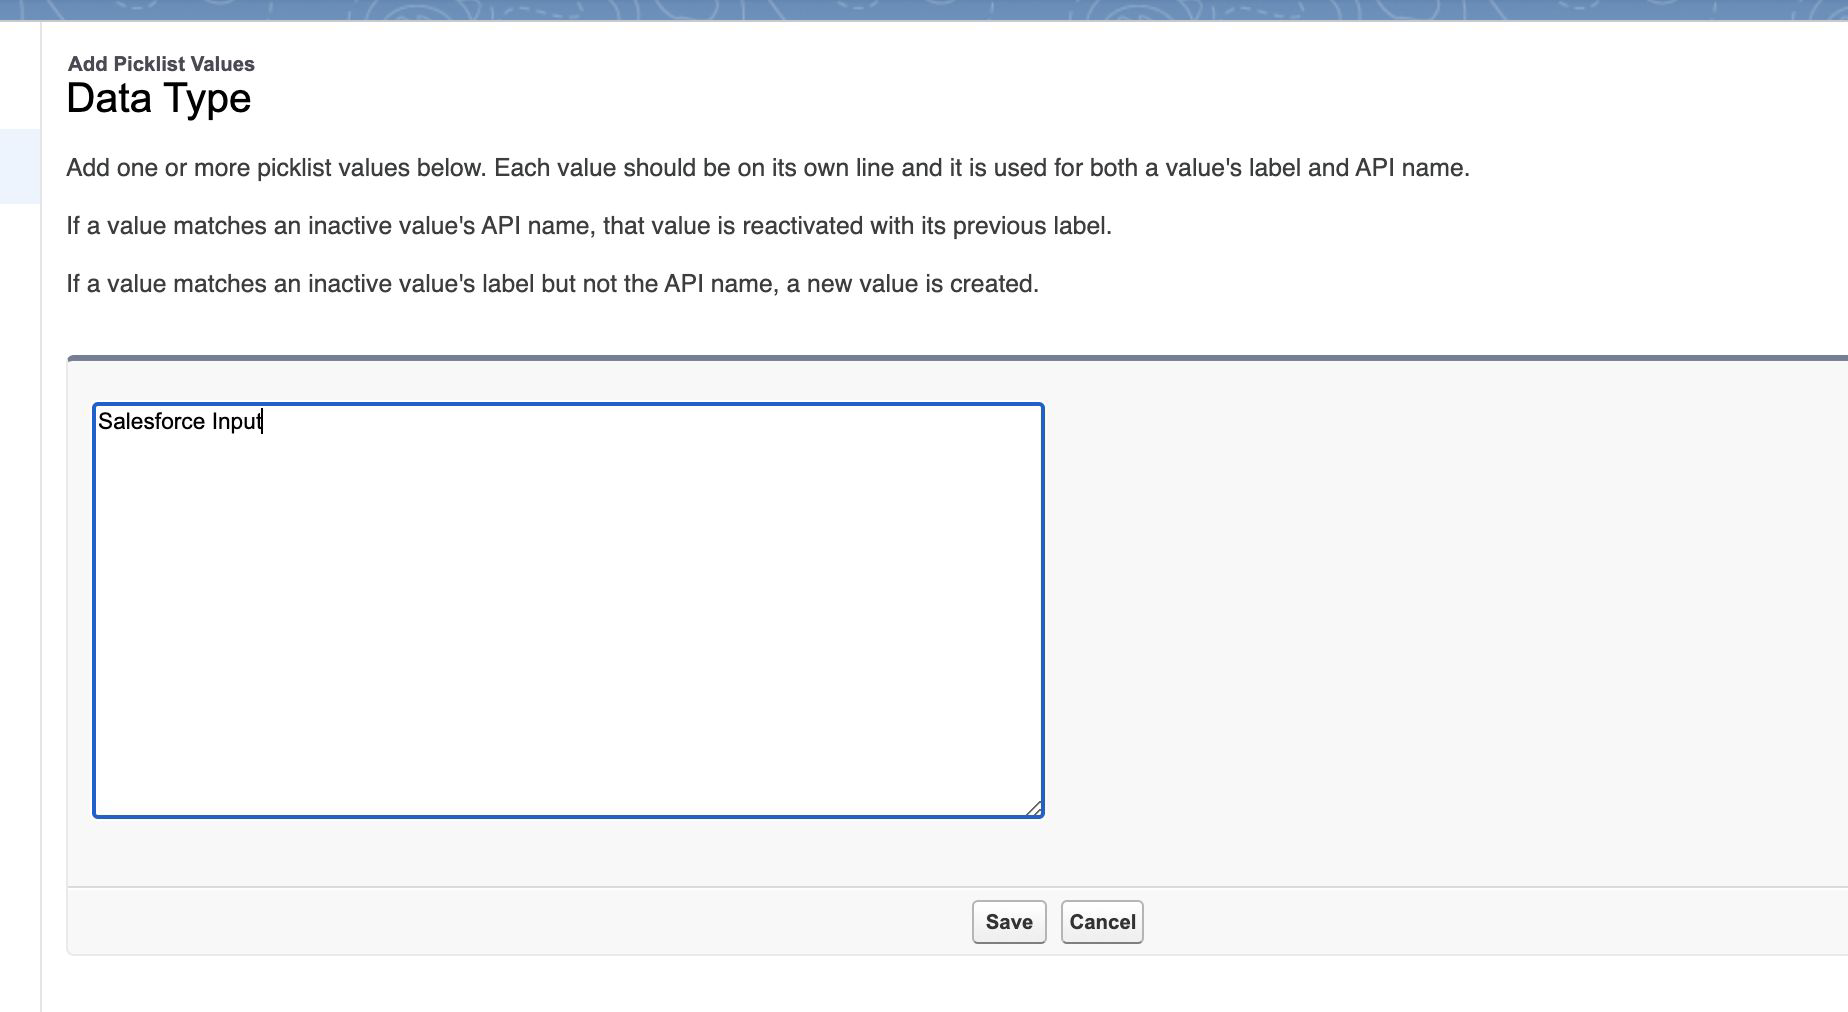
Click to enlarge
All values should look like this.
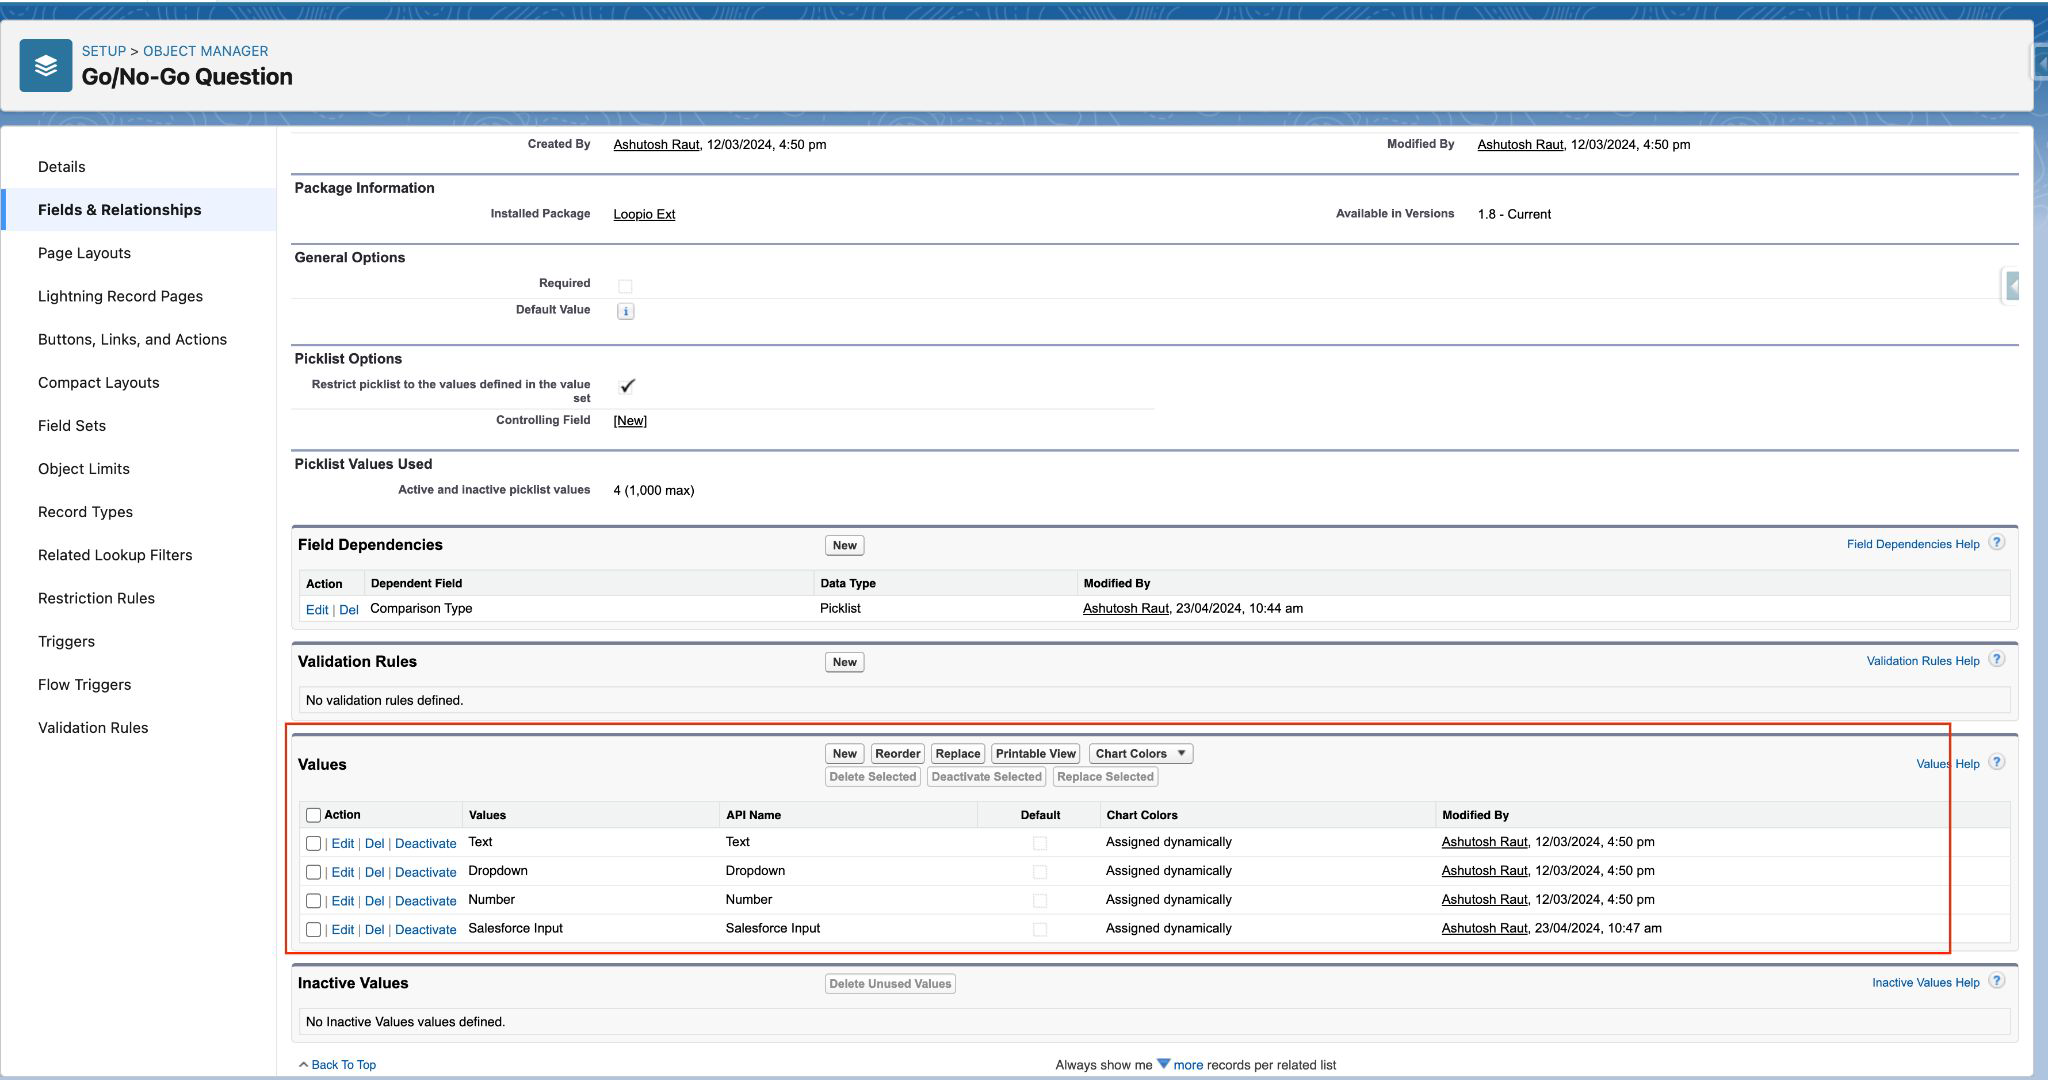
Click to enlarge
Creating Go/No-Go Submission Lookup field on LFS Project
Click on Setup.

Click to enlarge
Click on Object Manger. Search for Project and open Project.
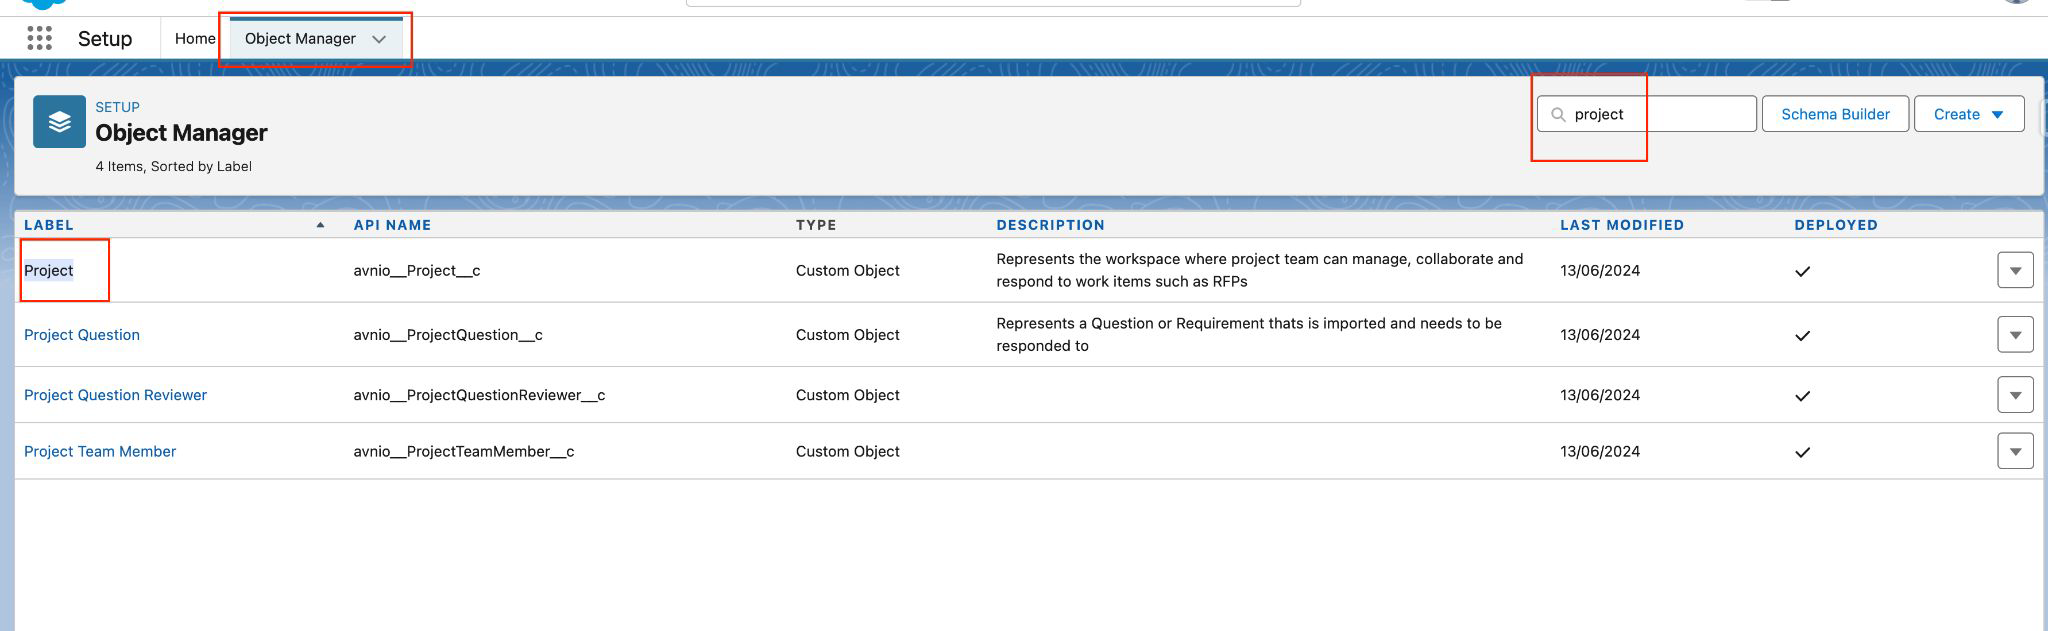
Click to enlarge
Click on Fields & Relationships and click on New.
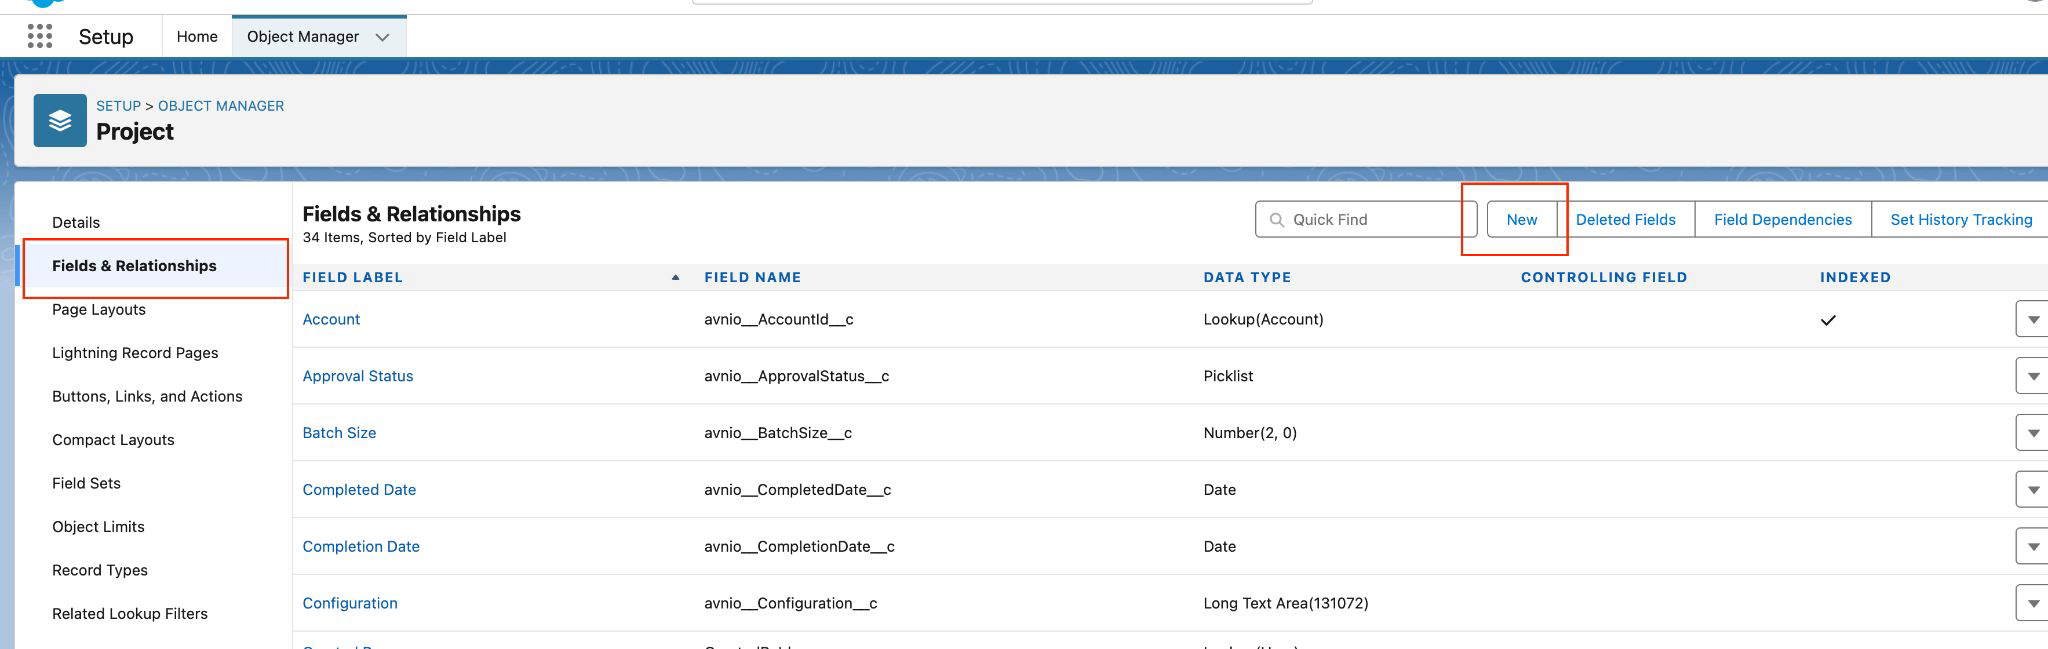
Click to enlarge
Select Lookup Relationship and click on Next.
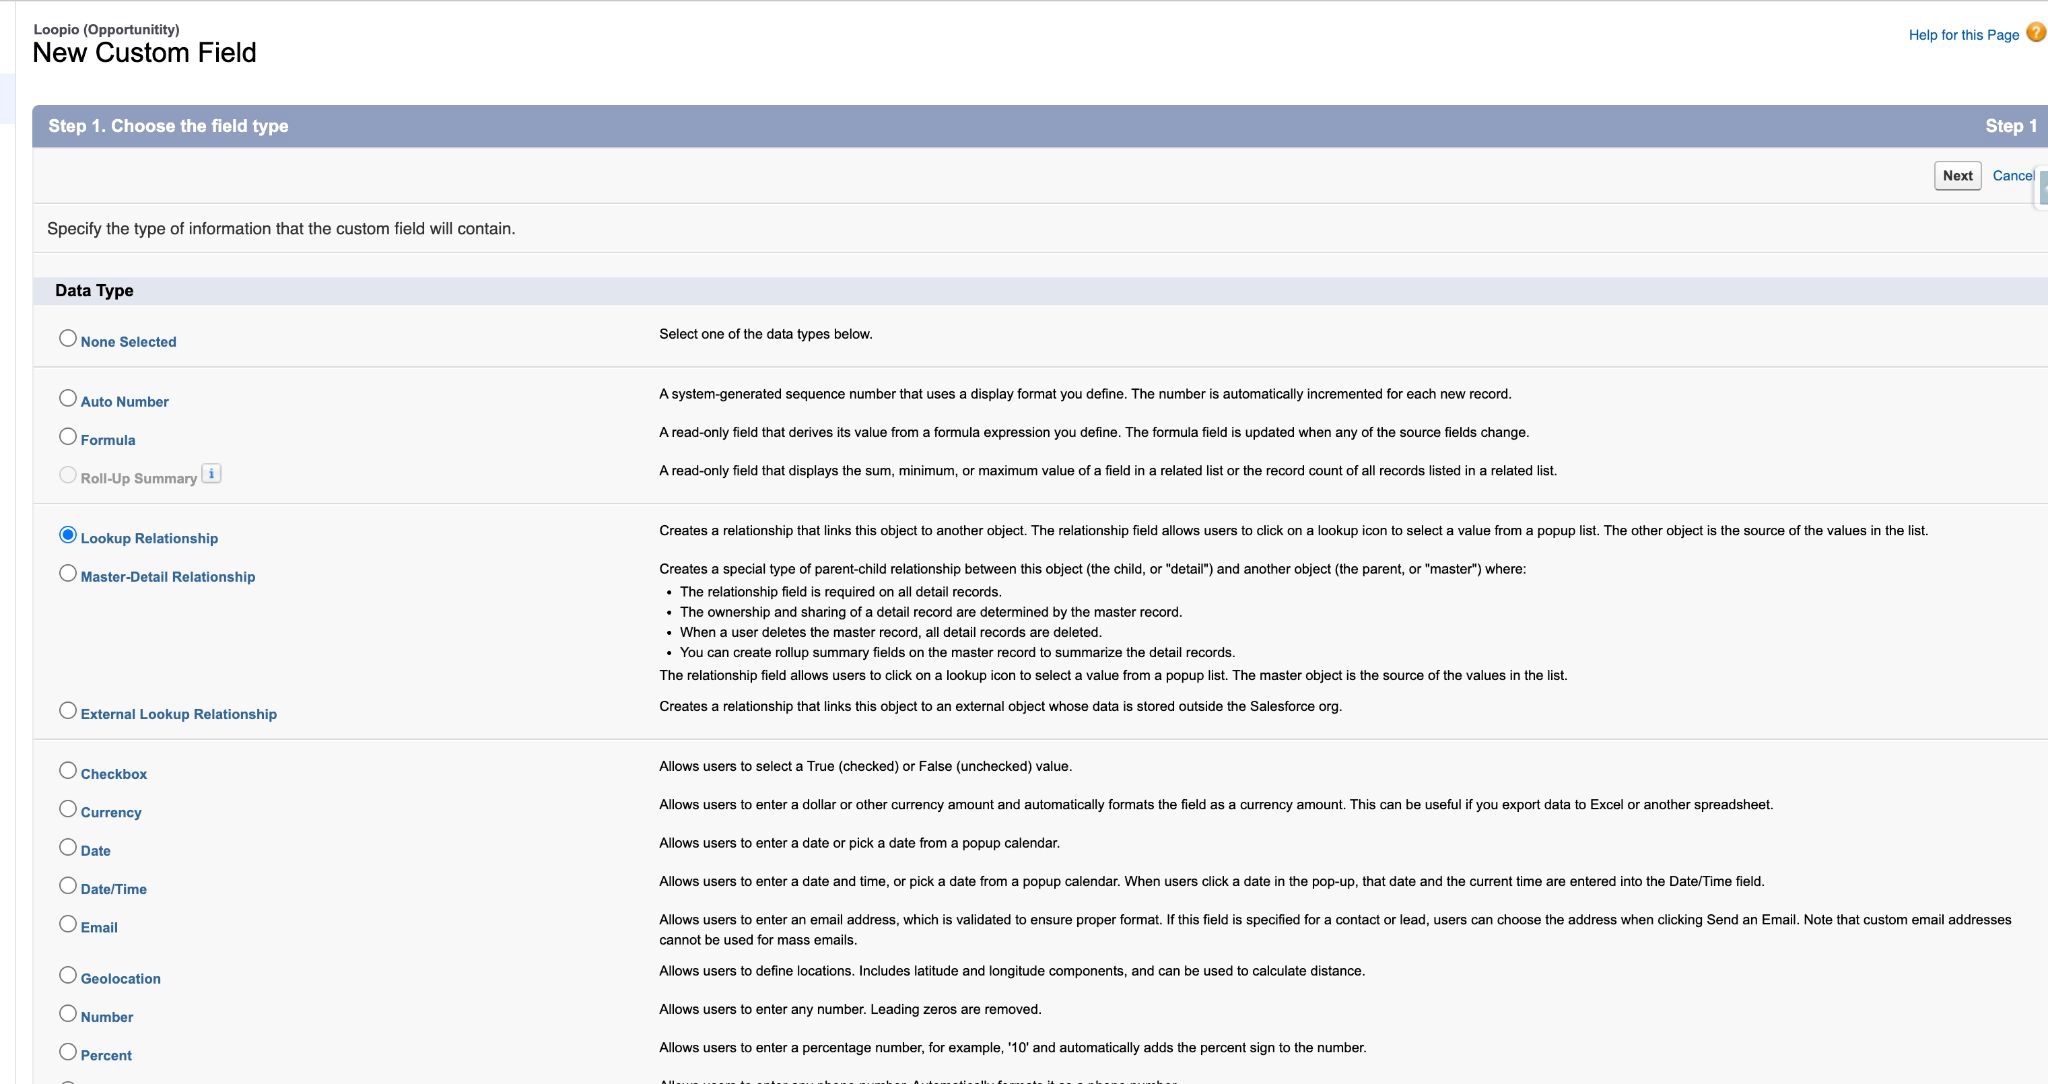
Click to enlarge
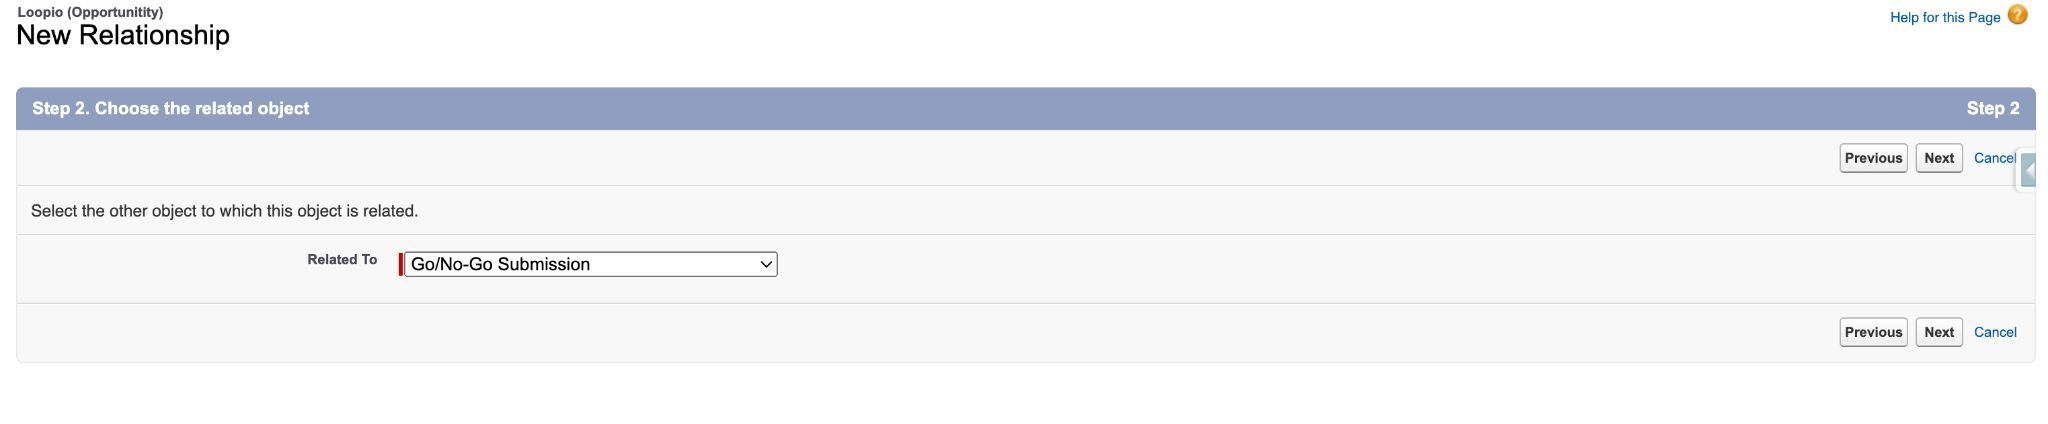
Select Related to Go/No-Go Submission. Click Next.
Click to enlarge
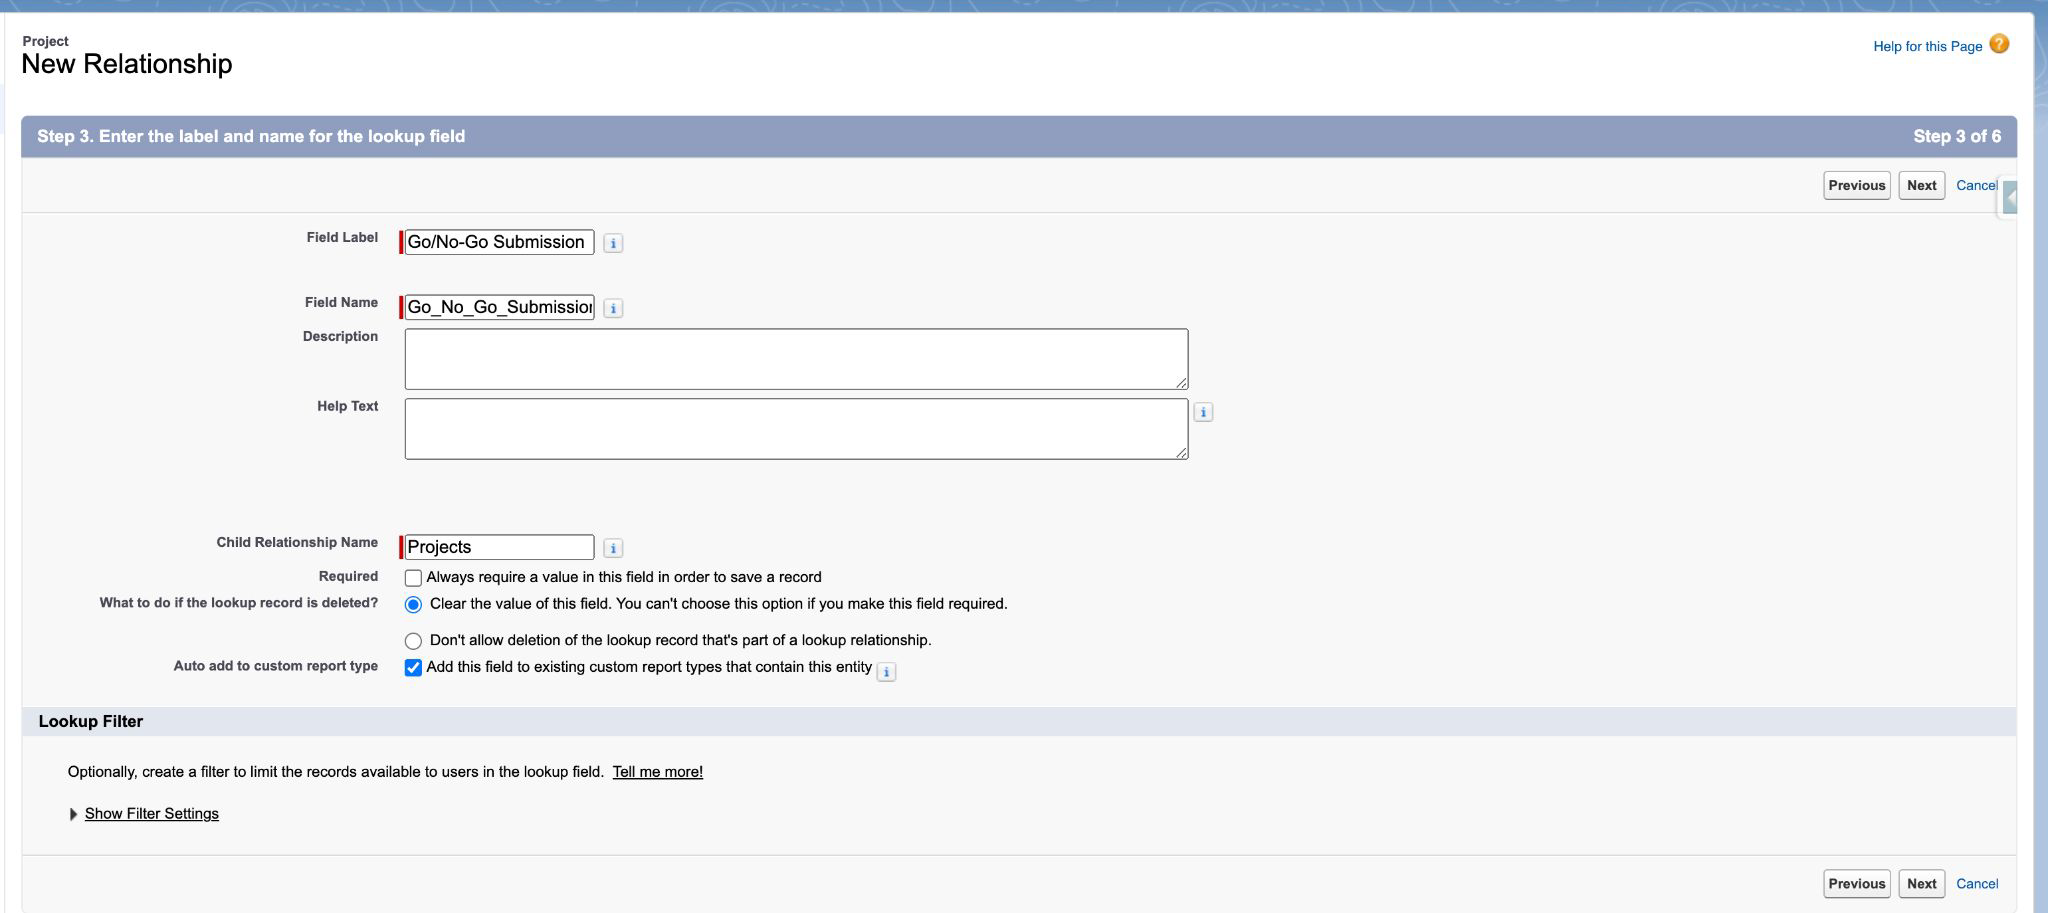
Keep field label as “Go/No-Go Submission” and field name as “Go_No_Go_Submission”. Click Next. Use without quotation marks.
Click to enlarge
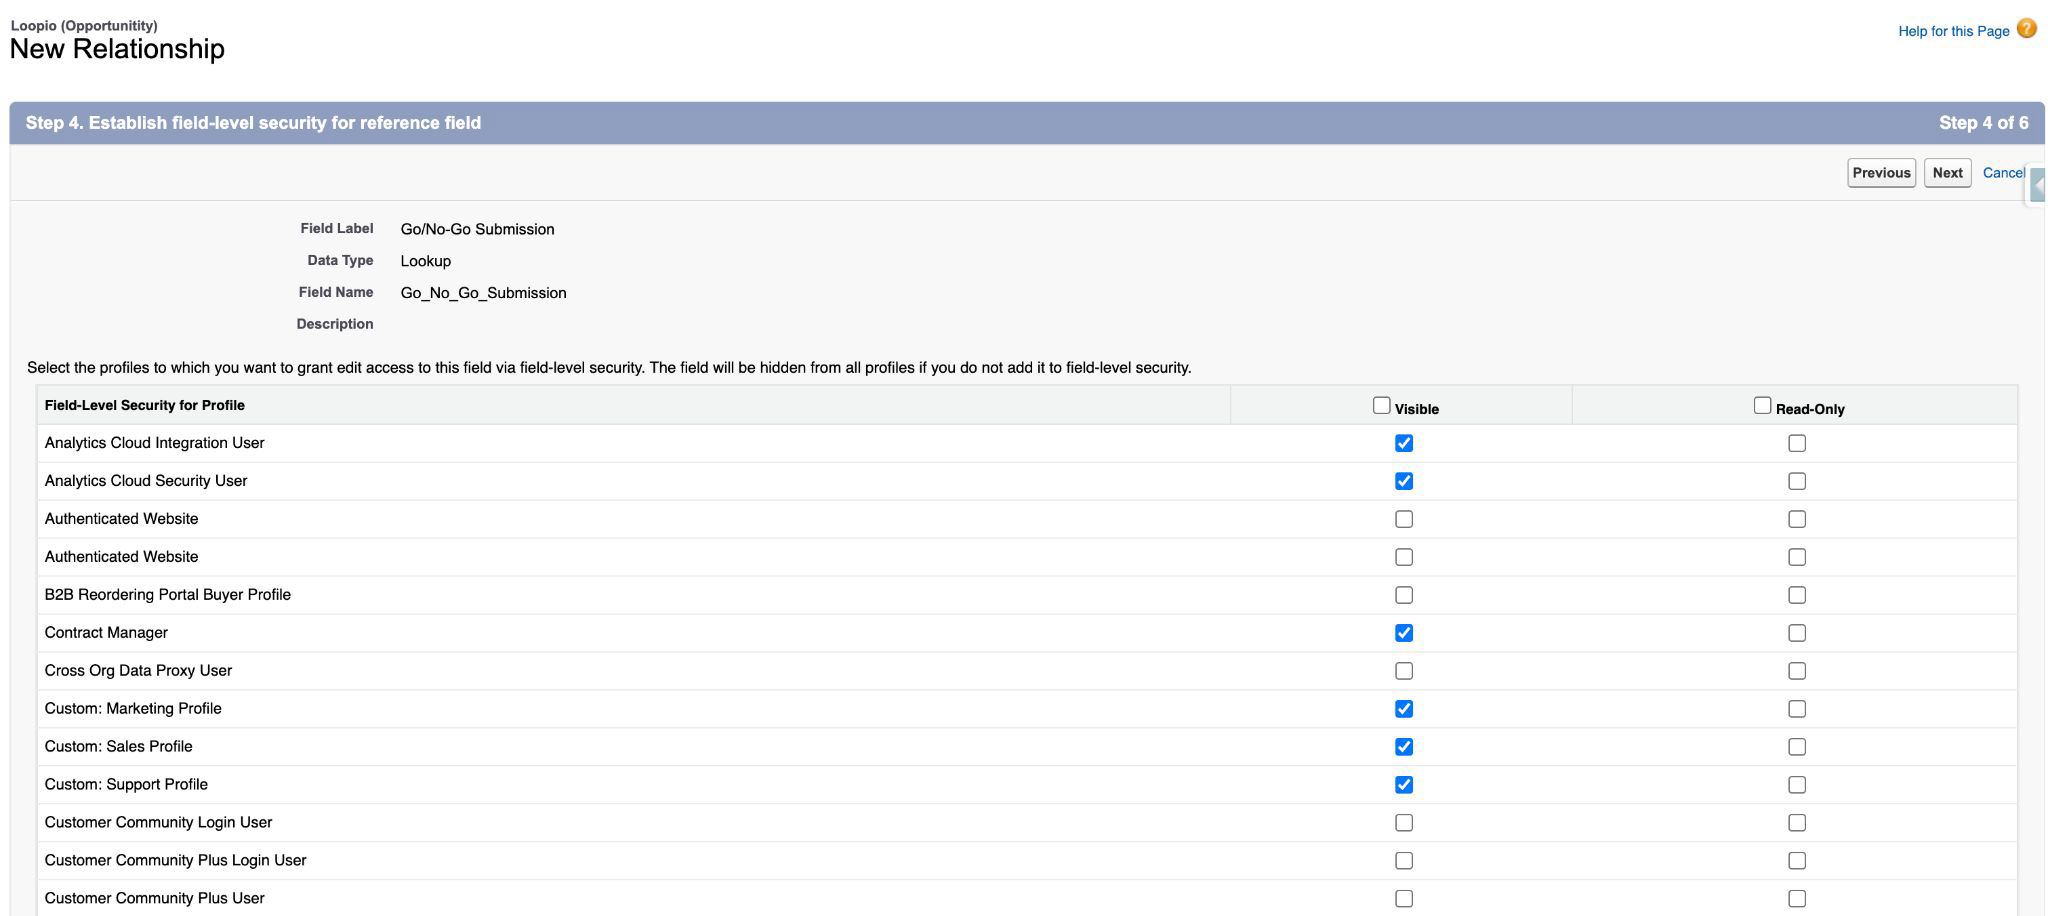
Add permissions to desired profiles. Click Next.
Click to enlarge
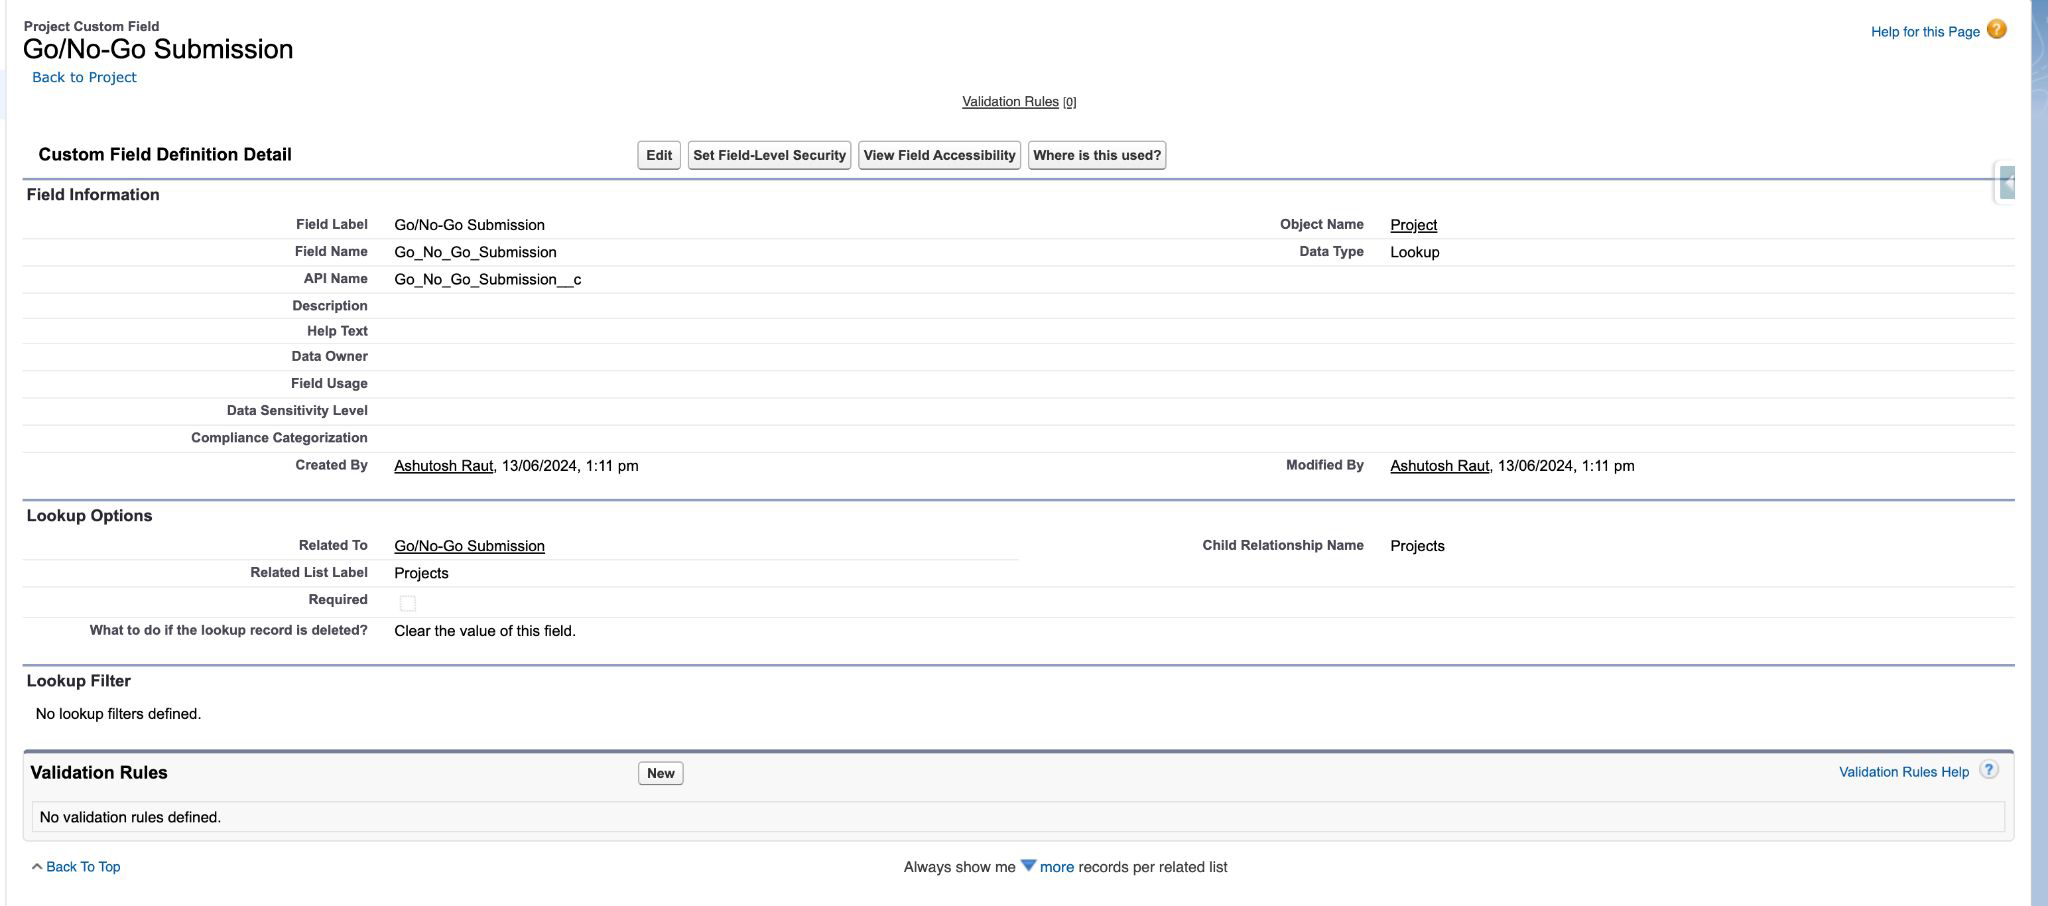
Click Next > Next and Save. The field should look like this.
Click to enlarge
Remove Buttons from Projects related list of Go/No-Go Submission
page
Click on the object manager at the top and open the Go/No-Go Submission object. From the left navigation bar, select Page Layouts, and select the page layout you would like to remove the buttons.

Click to enlarge
Select Related Lists in the Elements Selection panel.
Click to enlarge
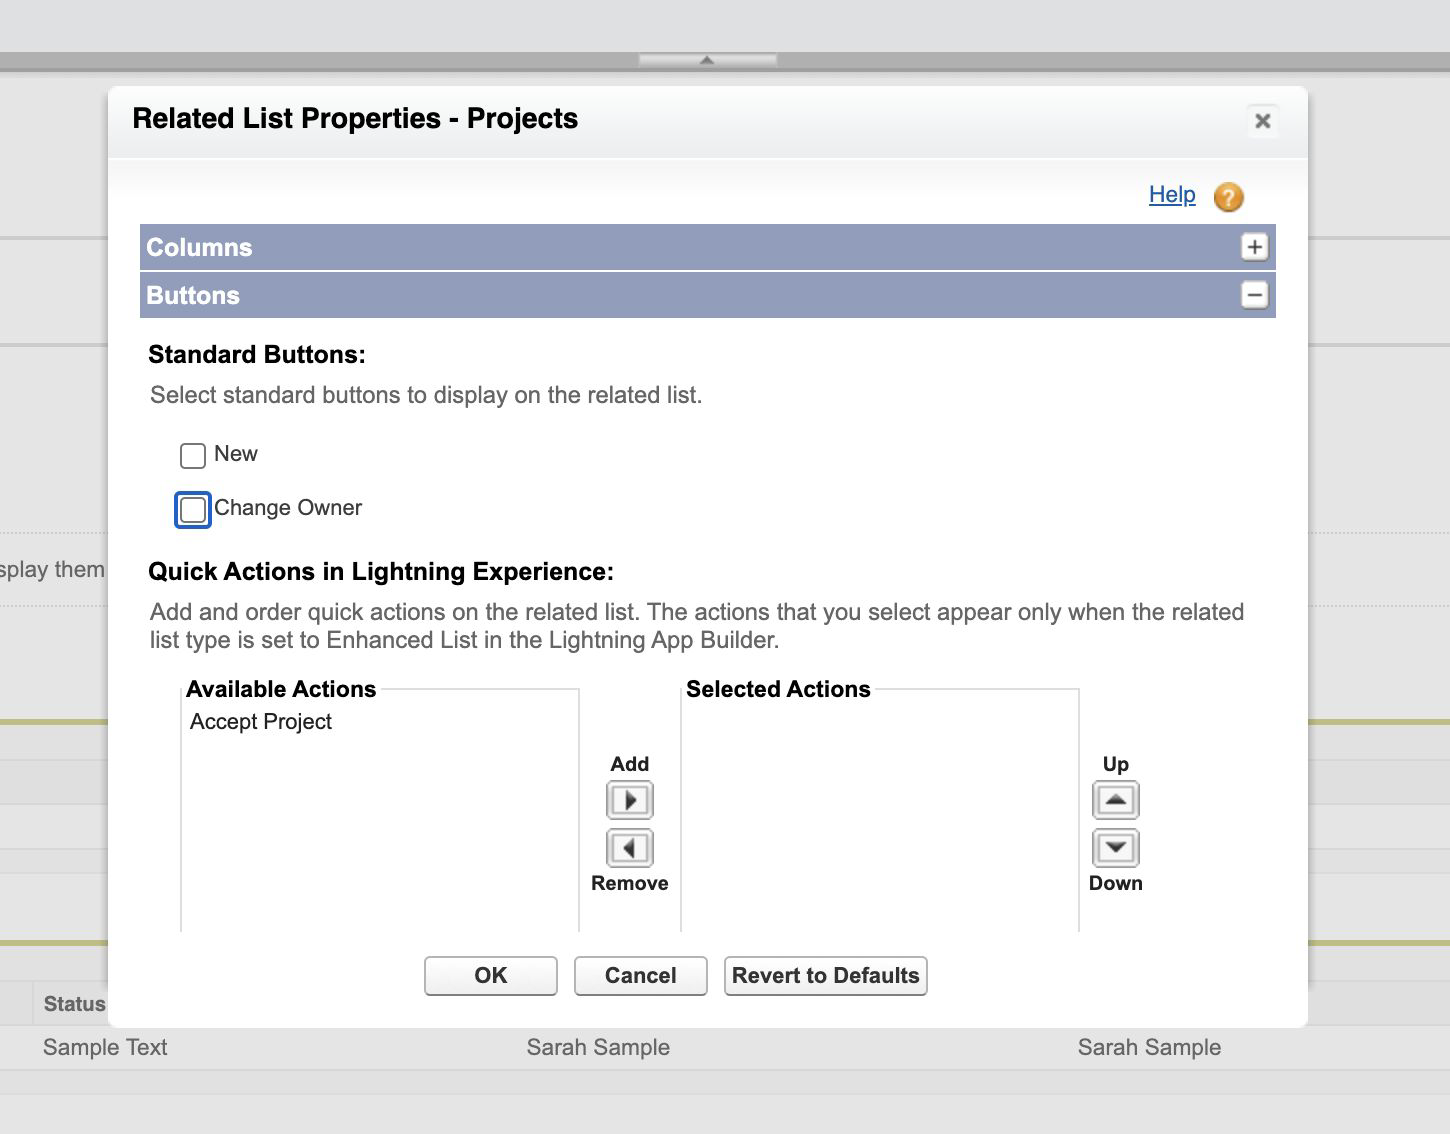
Edit Projects related list. Remove Standard Buttons from the buttons section of Related List Properties along with custom buttons. After related list changes are done, click on ok. Save the page layout.
Click to enlarge
Sharing Go/No-Go Reports and Dashboards with Users
Once you assign one of the two Go/No Go permission sets mentioned above to your users, they’ll be able to open and use the Go/No Go functionality.
Unless they are granted access to the custom dashboard included as part of the Go/No-Go package, they’ll see the home page as a blank screen.
To give users access to this dashboard:
Click the App Launcher icon.
Search for and select Dashboards.
Click All Folders.
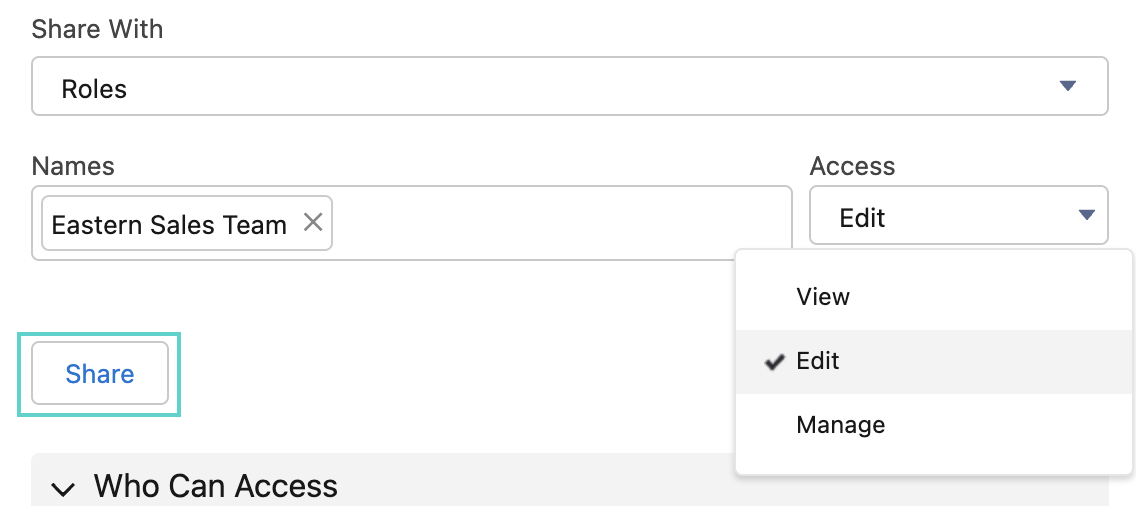
Click the dropdown to the right of the Go/No-Go Dashboards folder and select Share.

Click to enlarge
Select the User(s) or Role(s) you want to give access to.
Select an access level.
Click Share.

Click to enlarge
Click Done.
Click the App Launcher icon.
Search for and select Reports.
Click All Folders.
Click the dropdown to the right of the Go/No-Go Dashboards folder and select Share.

Click to enlarge
Select the User(s) or Role(s) you want to give access to.
Select an access level.
Click Share.
Click to enlarge
Click Done.