Configuring an Approval Process for the Loopio Go/No-Go App for Salesforce
When is the Approval Process Used?
Permissions Required: A Salesforce license, with the Go/No-Go Admin permission set, is required to configure the Go/No-Go app in Salesforce.
When a User initiates a Project using the Go/No-Go App in Salesforce, they will see on of two results after submitting their responses:
If the answers met or exceeded the scoring threshold defined by your team, the user will see a Create Loopio Project button.
If the answers did not meet the scoring threshold, the user will see an option to Submit for Approval. When the user submits the Project for approval, the Go/No-Go Submission will enter the Approval Process.
Creating an Approval Process
Select the Go/No-Go Settings tab.
Tip: Don't see the Go/No-Go Settings tab? Look in the More dropdown, or go to the App Launcher and search for and select Go/No-Go.
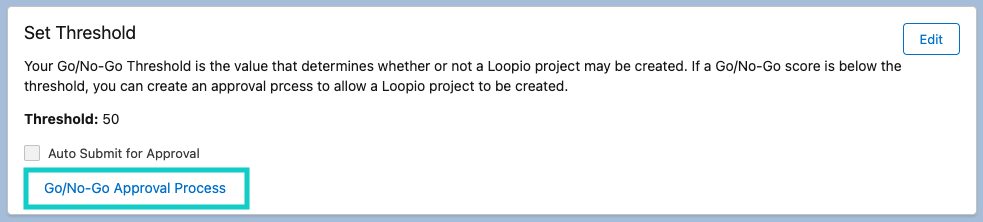
Click Go/No-Go Approval Process on the Set Threshold tile to set up your Go/No-Go Approval Process.
Click to enlarge
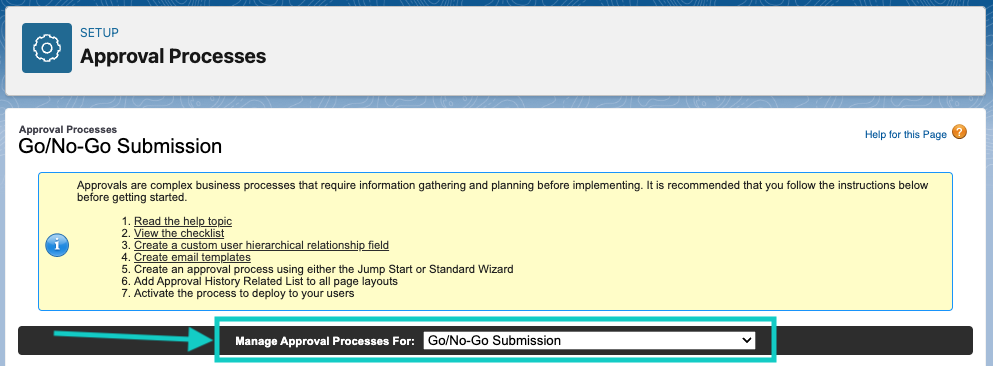
In the Manage Approval Processes For dropdown, select Go/No-Go Submission.
Click to enlarge
In the Create New Approval Process dropdown select Use Standard Setup Wizard.

Click to enlarge
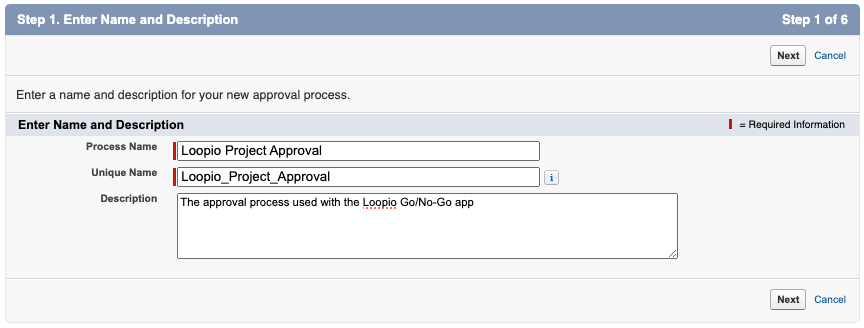
Enter a name in the Process Name field.
Enter a Description for the Approval Process (optional), then click Next.
Click to enlarge
Leave the Entry Criteria options blank and click Next.
Fill in the options in the Select Field Used for Automated Approval Routing and Record Editability Properties sections and click Next.
Select an email template (optional) and click Next.
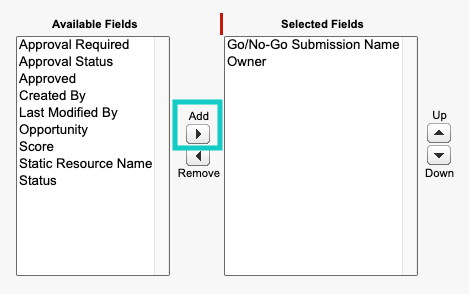
Select the fields you want to display on your Approval Page Layout by selecting them and clicking the Add (right arrow) button.
Click to enlarge
(optional) Under Approval Page Fields, select Display approval history information in addition to the fields selected above.

Click to enlarge
Tip: Select Click here to view an example to see an example of where the selected elements will appear.
Under Security Settings, select Allow approvers to access the approval page only from within the Salesforce application. (Recommended) and click Next.
Specify Initial Submitters- Submission Settings and click Save.
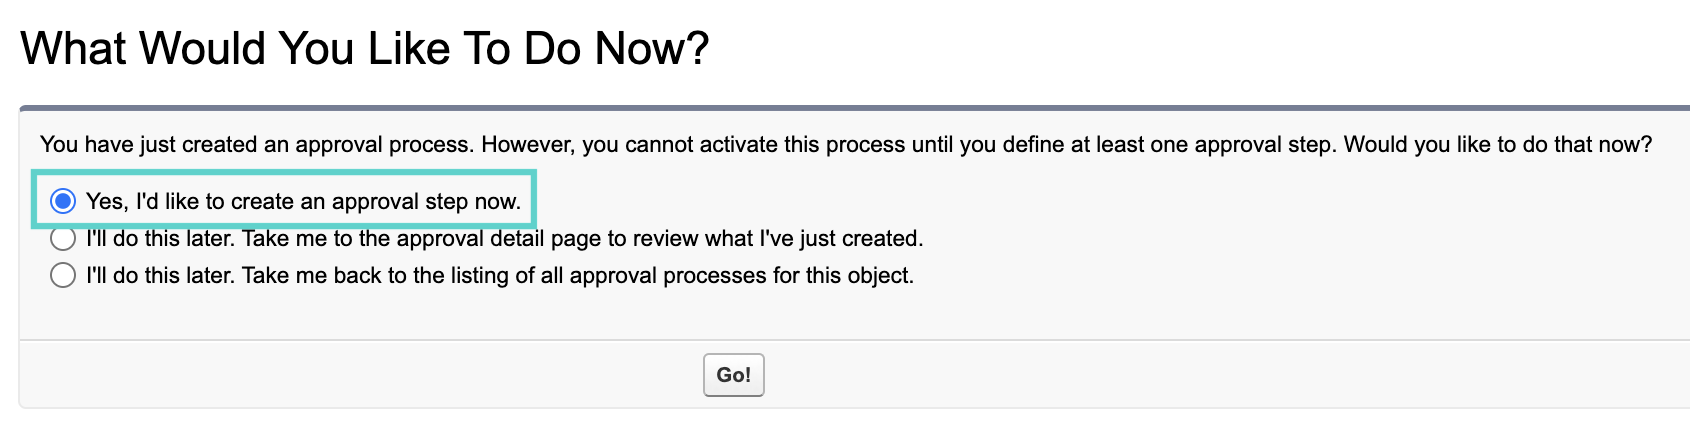
Select Yes, I'd like to create an approval step now and click Go! to continue to the Defining Approval Actions section of this guide below.
Click to enlarge
Note: You can also select I'll do this later. Take me to the approval detail page to review what I've just created and continue with the steps below after viewing the Approval Process Details page.
Defining Approval Actions
From the Approval Process Detail page you can define elements of the Approval Workflow process.
Approval Workflow Steps
Beside Approval Steps, click New Approval Step.

Click to enlarge
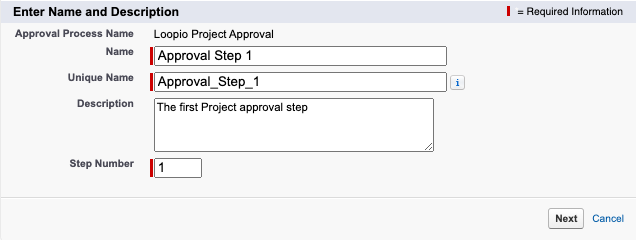
Enter a Name for this Approval Step.
Enter a Description (optional).
Enter a Step Number and click Next.
Click to enlarge
Select All records should enter this step. and click Next.
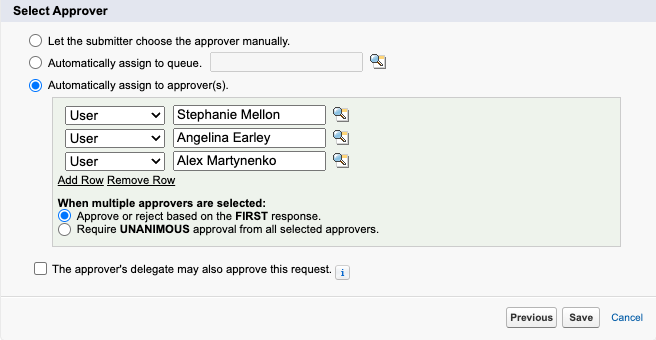
Select a queue or approver(s) to assign the Go/No-Go Submission to for approval and click Save.
Click to enlarge
Tip: Refer to this Salesforce guide [External: Salesforce] Considerations for Setting Approvers for more information on how to set Approvers
Select No, I'll do this later. Take me to the approval process detail page to review what I've just created. and click Go!
Repeat the steps in this section to create any additional required Approval Steps.
Initial Submission Actions
Beside Initial Submission Actions, click Add New and select Field Update.

Click to enlarge
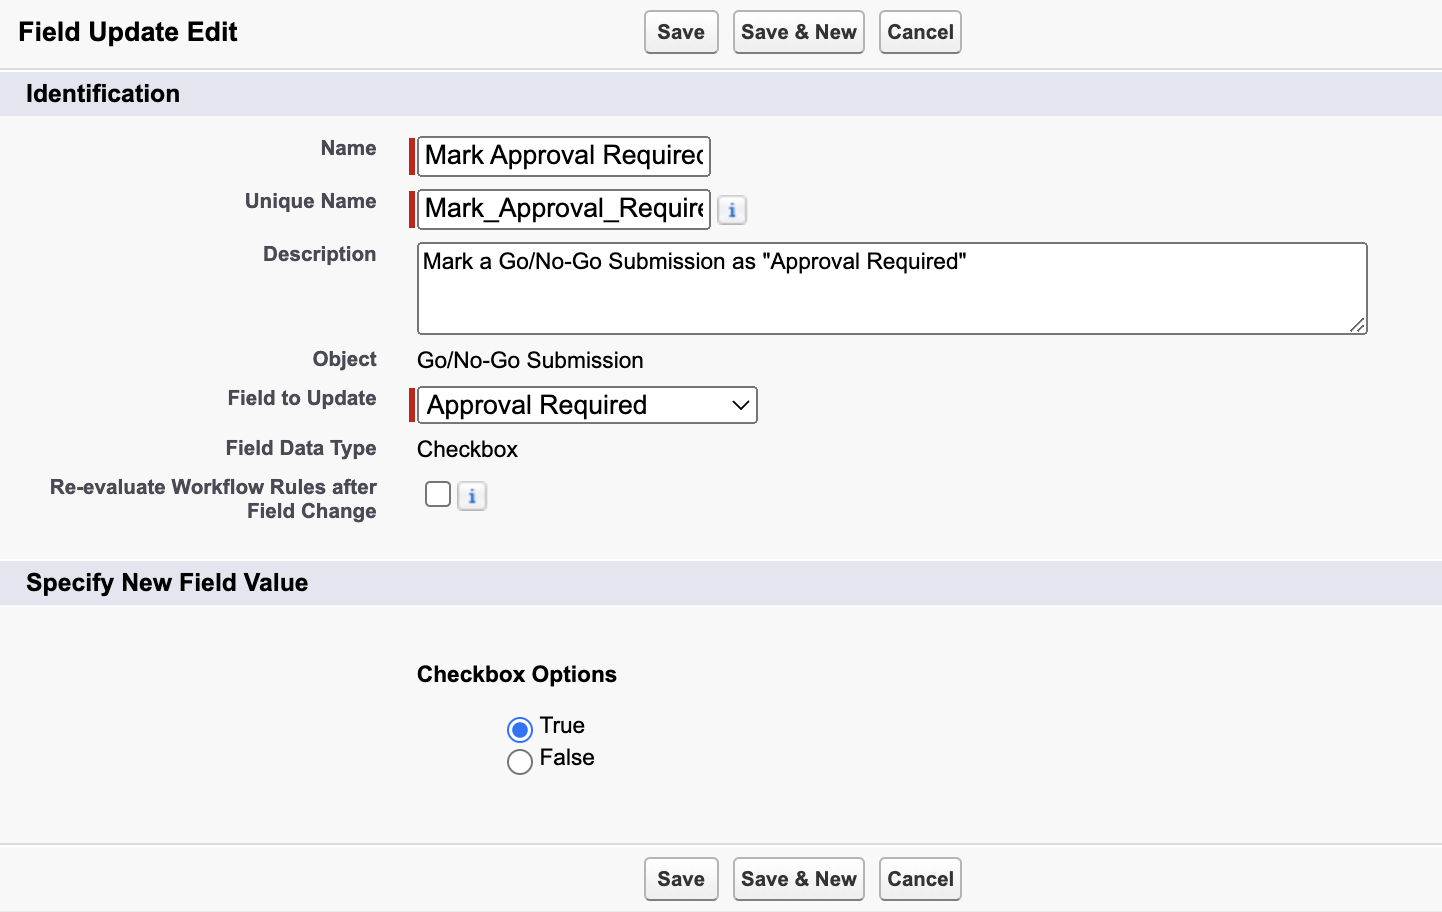
Enter a Name, such as Mark Approval Required.
Add a description, such as Mark a Go/No-Go Submission as "Approval Required" (optional).
In the Field to Update dropdown, select Approval Required.
Under Specify New Field Value, select True.
Click to enlarge
Click Save & New.
Enter a Name, such as Mark Pending Approval.
(optional) add a description, such as Mark a Go/No-Go Submission as "Pending Approval".
In the Field to Update dropdown, select Approval Status.
Under Specify New Field Value, select A specific value, then select Pending Approval.
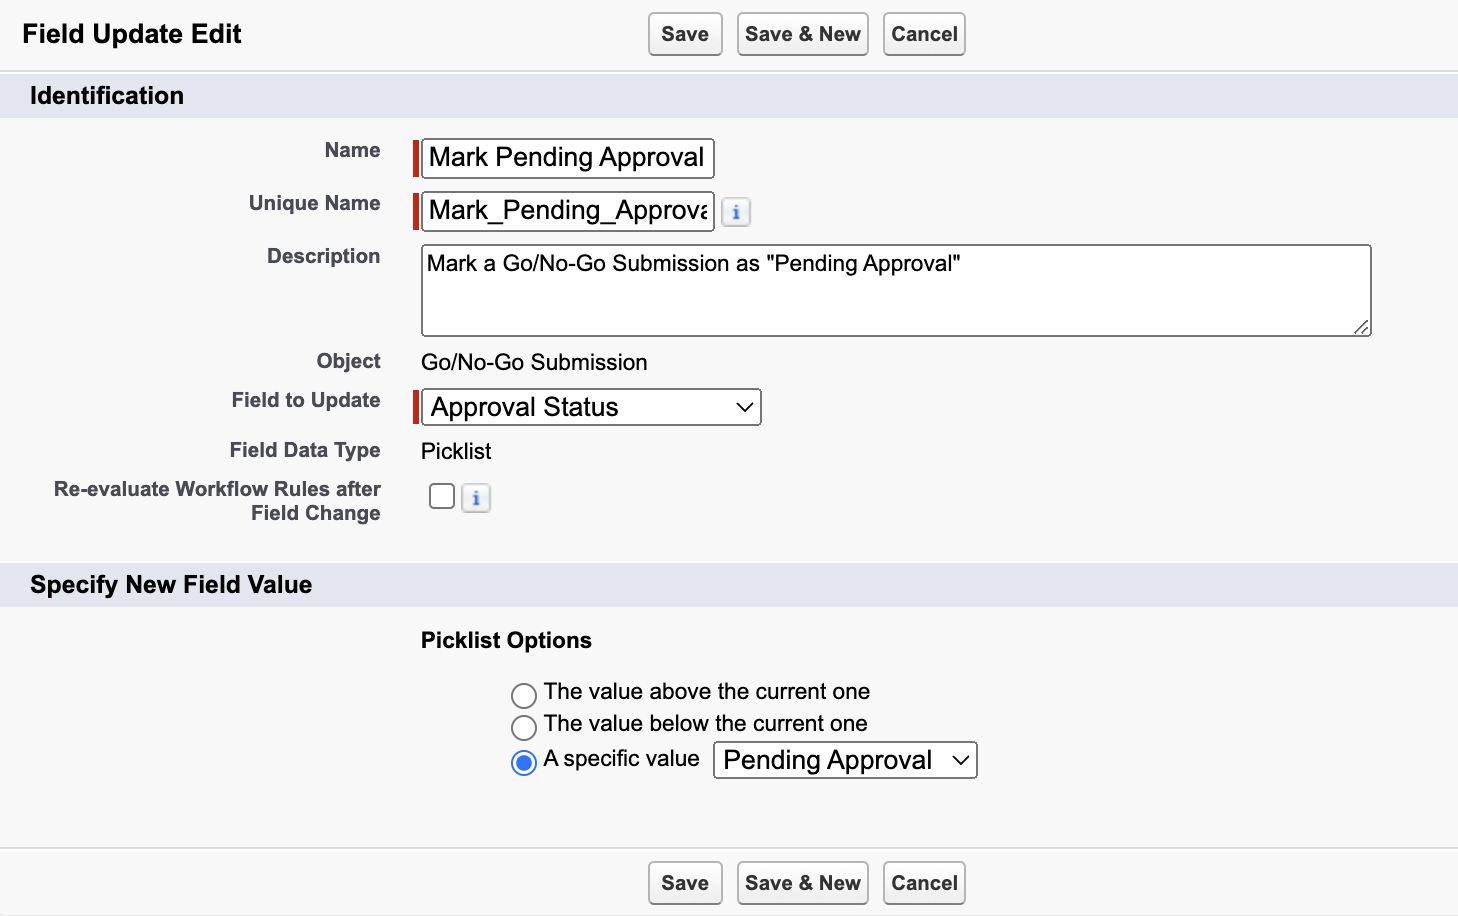
Click to enlarge
Click Save.
After completing the above steps, the Initial Submission Actions sections will look similar to this:

Click to enlarge
Final Approval Actions
Under Final Approval Actions, click Add New and select Field Update.
Enter a Name, such as Final Approval.
(optional) add a description, such as Action when a Go/No-Go submission is approved.
In the Field to Update dropdown, select Approved.
Under Specify New Field Value, select True.
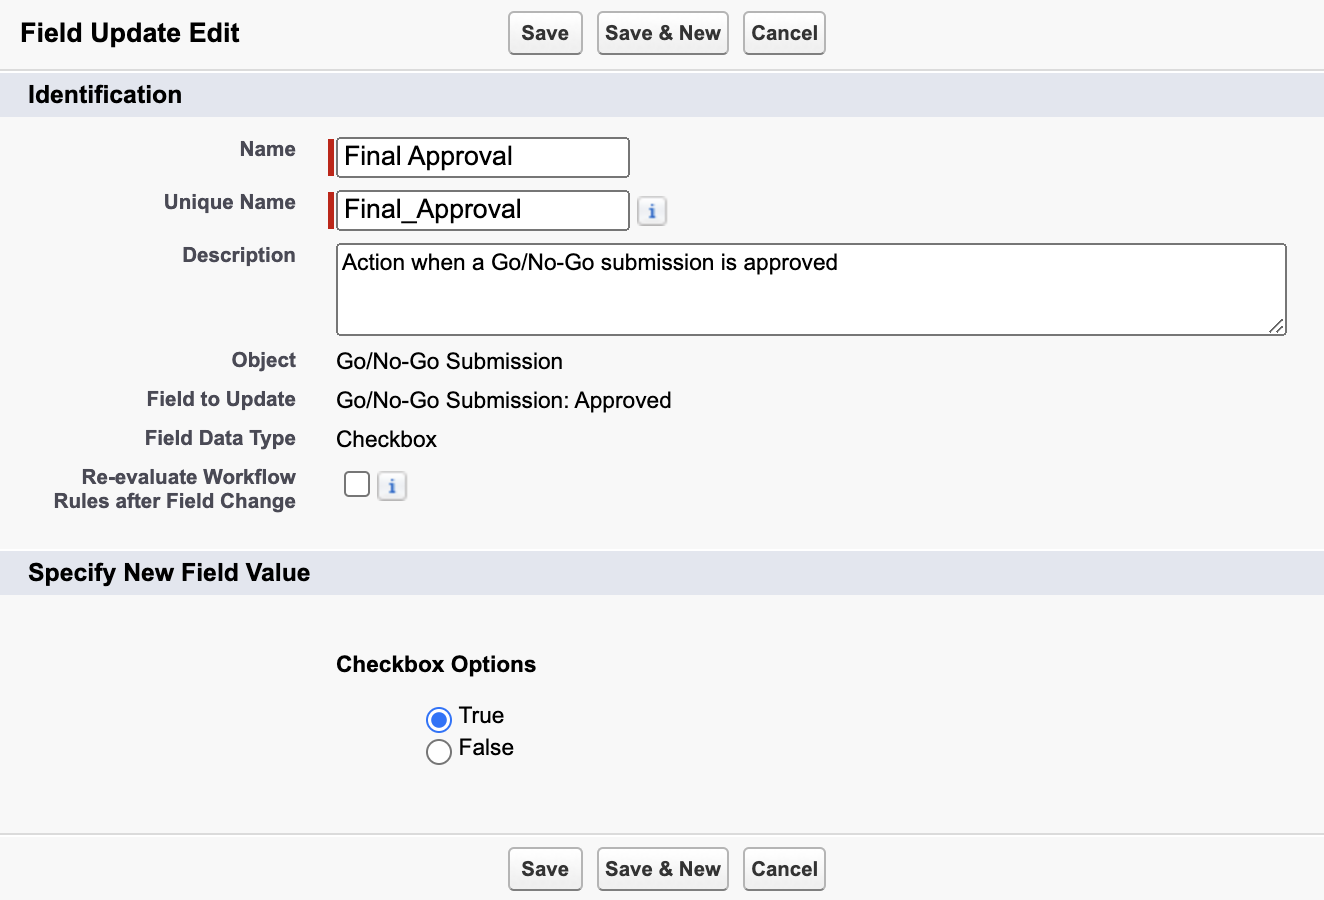
Click to enlarge
Click Save & New.
Enter a Name, such as Final Approval Status Approved.
(optional) add a description, such as Action when a Go/No-Go submission is approved.
In the Field to Update dropdown, select Approval Status.
Under Specify New Field Value, select A specific value, then select Approved.
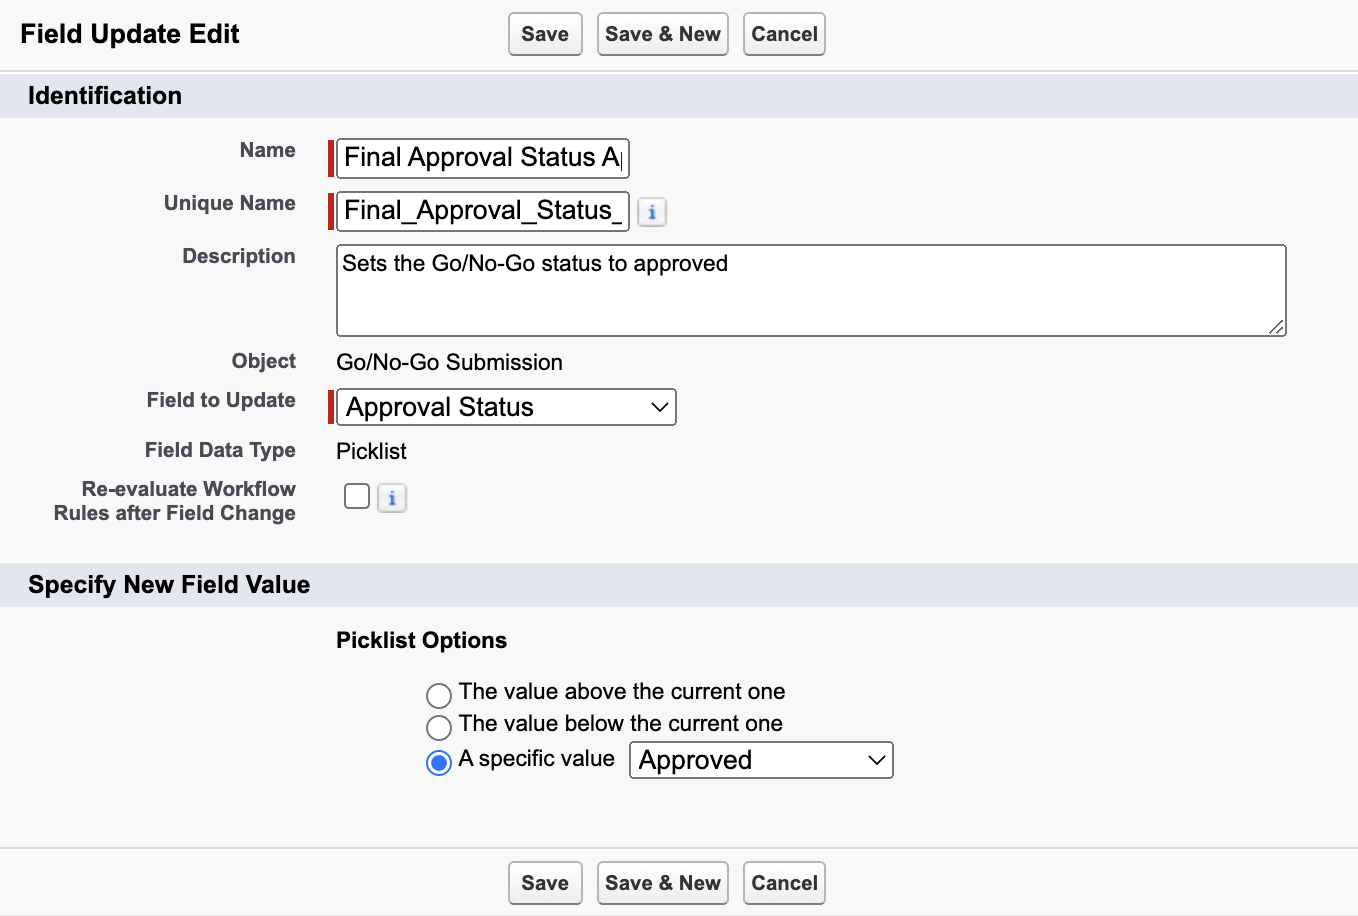
Click to enlarge
Click Save.
After completing the above steps, the Final Approval Actions sections will look similar to this:

Click to enlarge
Final Rejection Actions
Under Final Approval Actions, click Add New and select Field Update.
Enter a Name, such as Final Rejection.
(optional) add a description, such as Action when a Go/No-Go submission is rejected.
In the Field to Update dropdown, select Approved.
Under Specify New Field Value, select False.
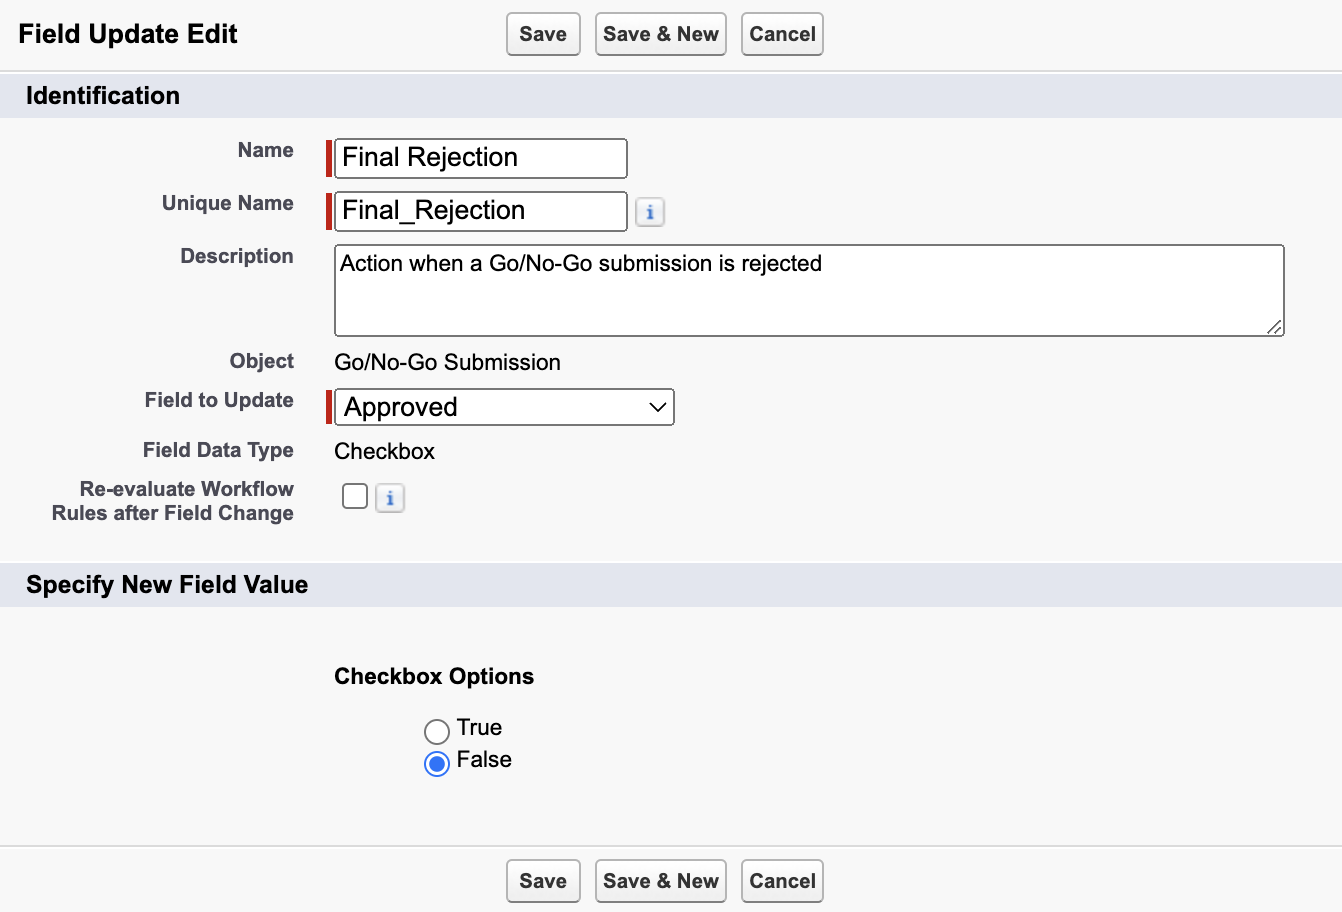
Click to enlarge
Click Save & New.
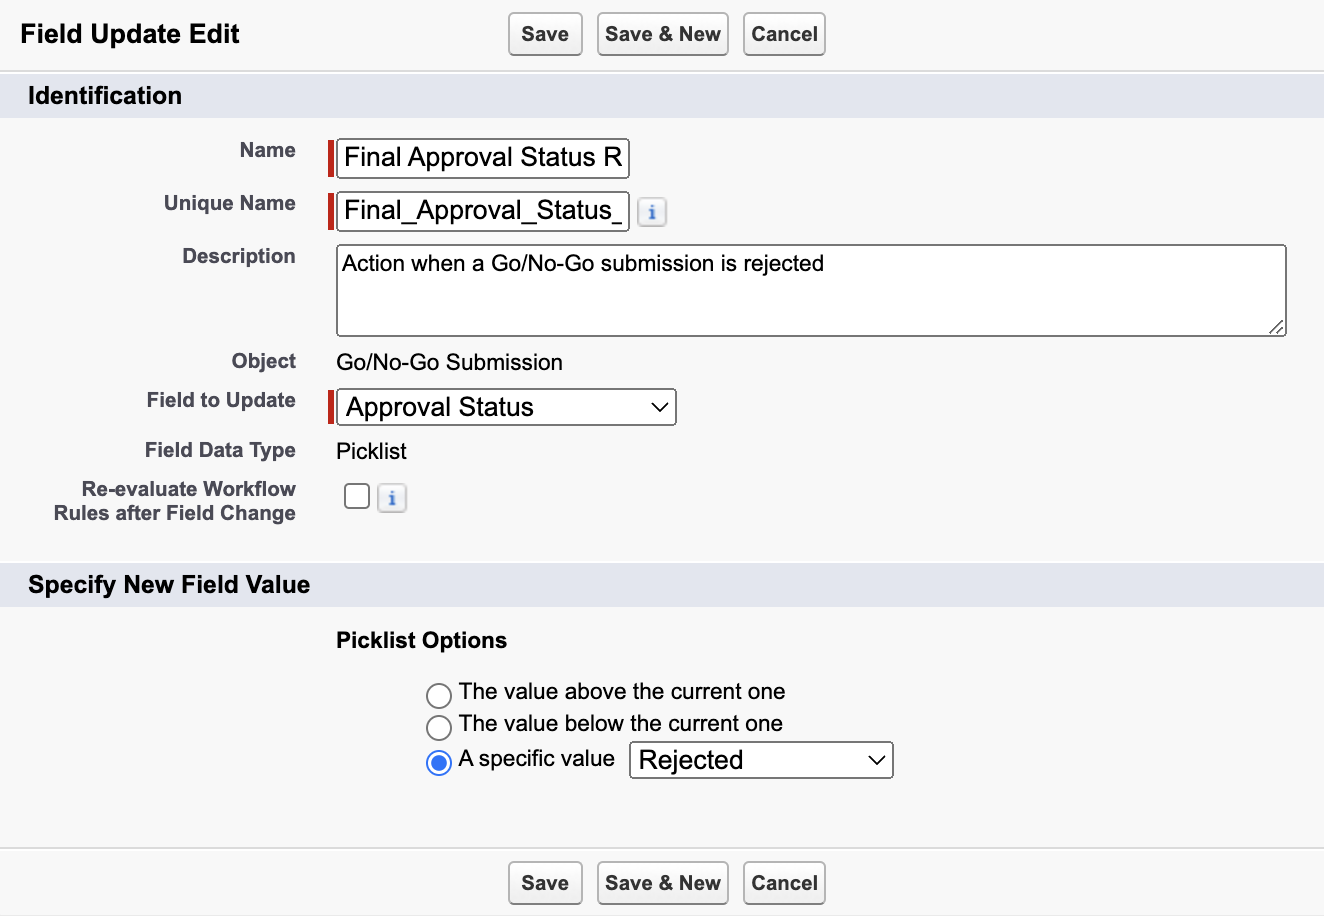
Enter a Name, such as Final Approval Status Rejected.
(optional) add a description, such as Action when a Go/No-Go submission is rejected.
In the Field to Update dropdown, select Approval Status.
Under Specify New Field Value, select A specific value, then select Rejected.
Click to enlarge
Click Save.
After completing the above steps, the Final Rejection Actions sections will look similar to this:

Click to enlarge
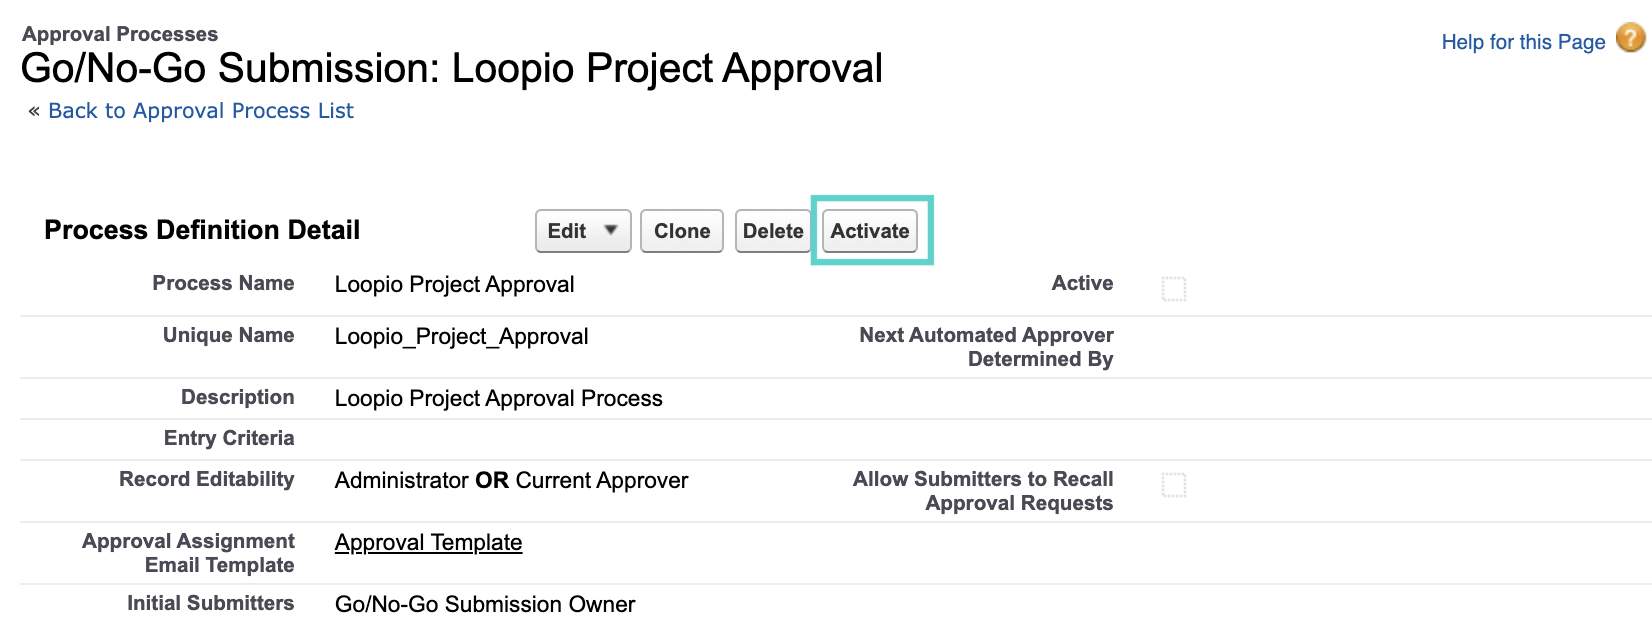
Activate the Approval Process
Once configuration is completed, the Go/No-Go Admin needs to activate the Approval Process. When any Go/No-Go Submission is created with a Go/No-Go Score less than or equal to the defined approval threshold value, it will restrict users from creating a Project until the record is approved.
Click to enlarge